
Sweet and Sour Chicken: A Crispy, Flavorful Takeout Favorite Made Easy
Craving the perfect balance of tangy, sweet, and crispy? This Sweet and Sour Chicken recipe delivers restaurant-quality flavor with a fraction of the effort. Whether you’re a weeknight warrior or a meal-prep enthusiast, this dish is a guaranteed crowd-pleaser—featuring juicy chicken, vibrant bell peppers, and a glossy homemade sauce that clings to every bite. Skip the takeout and make it better at home!
A Brief History of Sweet and Sour Chicken
Sweet and sour dishes have roots in Chinese cuisine, dating back to the 18th century. Originally from the Guangdong province, the sauce was traditionally made with vinegar and sugar to preserve food. The Westernized version—popularized in American-Chinese restaurants—features a thicker, sweeter sauce with pineapple and bell peppers.
Interestingly, the concept of balancing sweet and sour flavors is found in many global cuisines. In ancient China, this combination was believed to promote digestion and balance the body’s energy. Over time, immigrants adapted the dish to local tastes, leading to the crispy, saucy version we love today.
Why You’ll Love This Recipe
Better than takeout – Crispy, saucy, and packed with fresh ingredients.
Quick & easy – Ready in under 40 minutes.
Customizable – Swap veggies or adjust sweetness to taste.
Meal-prep friendly – Reheats beautifully for lunches.
Family-approved – Kids and adults alike adore the sweet-tangy flavors.
Key Ingredients & Why They Matter
The Chicken: Crispy & Juicy Perfection
- Boneless, skinless chicken breast or thighs – Thighs stay juicier, while breasts are leaner.
- Cornstarch coating – Creates an ultra-crispy exterior without heavy batter.
- Egg wash – Helps the cornstarch adhere for maximum crunch.
The Sweet and Sour Sauce: The Star of the Show
- Pineapple juice – Adds natural sweetness and fruity depth.
- Rice vinegar – Provides the essential tangy kick.
- Brown sugar – Balances acidity with caramelized richness.
- Ketchup – Adds umami and helps thicken the sauce.
- Soy sauce – Enhances savoriness without overpowering.
The Veggies: Color & Crunch
- Bell peppers – Red and green for sweetness and texture.
- Onion – Adds aromatic depth.
- Pineapple chunks – Brings tropical sweetness and juiciness.
Step-by-Step Instructions (With Pro Tips)
1. Preparing the Chicken for Maximum Crispiness
- Cut evenly – Uniform 1-inch pieces ensure even cooking.
- Dry thoroughly – Pat chicken dry with paper towels to help the coating stick.
- Season well – Salt and pepper enhance flavor from the inside out.
2. Dredging & Frying Like a Pro
- Double-dip for extra crunch (optional) – For an even crispier crust, dip chicken in egg, then cornstarch, then egg again, and finally cornstarch once more.
- Fry in batches – Overcrowding the pan lowers oil temperature, leading to soggy chicken.
- Drain on a rack – Keeps the chicken crispy by allowing air circulation.
3. Crafting the Perfect Sweet and Sour Sauce
- Simmer to meld flavors – Let the sauce bubble gently for 1–2 minutes to deepen the taste.
- Adjust consistency – Prefer a thicker sauce? Add more cornstarch slurry. Want it lighter? Stir in a splash of water.
- Taste and tweak – Like it sweeter? Add honey. Prefer more tang? A splash of extra vinegar does the trick.
4. Stir-Frying the Veggies to Perfection
- High heat is key – A hot pan ensures crisp-tender veggies without sogginess.
- Add pineapple last – Prevents it from breaking down too much.
5. Bringing It All Together
- Toss gently – Coat the chicken and veggies evenly without breaking the crispy coating.
- Heat through – Just 1–2 minutes ensures everything is piping hot without overcooking.
Expert Tips & Troubleshooting
For extra crispiness: Double-fry the chicken (first at 325°F/165°C, then at 375°F/190°C) or use an air fryer (400°F for 8–10 minutes).
Too tangy? Balance with a bit more brown sugar or honey.
Sauce too thick? Thin with a splash of water or juice.
Chicken drying out? Avoid overcooking—remove from oil when golden brown (internal temp of 165°F/74°C).
Variations & Customizations
🌶 Spicy Version: Add 1 tsp sriracha or red pepper flakes to the sauce.
🍗 Baked Option: Skip frying—bake cornstarch-coated chicken at 400°F (200°C) for 20 minutes.
🥦 Veggie-Packed: Add carrots, snap peas, or broccoli.
🍯 Honey-Glazed Twist: Replace brown sugar with honey for a floral sweetness.
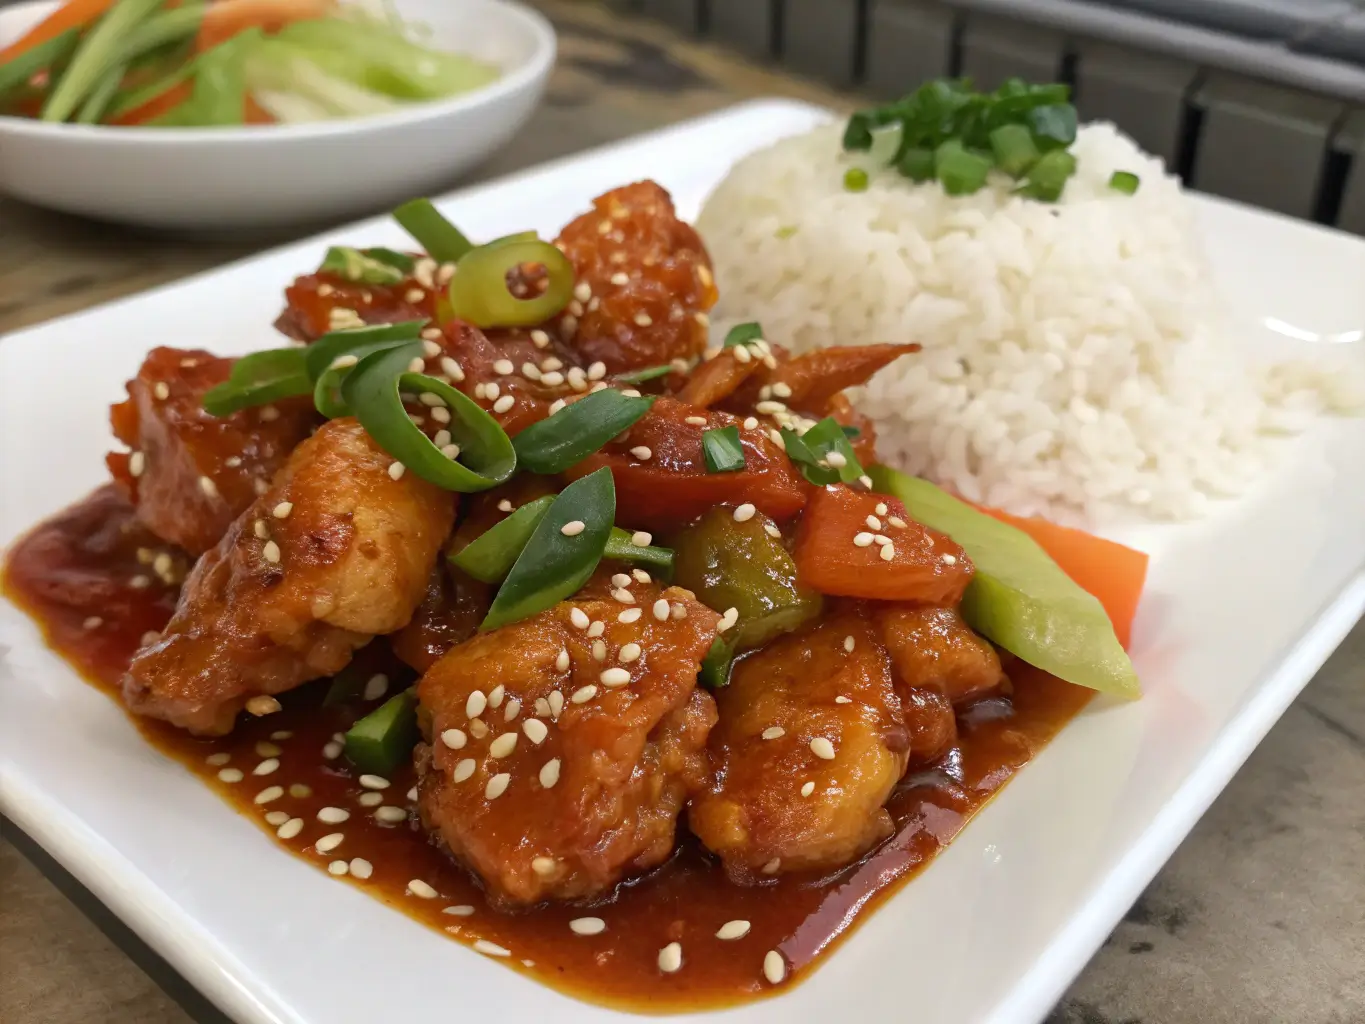
Serving & Presentation Ideas
Perfect Pairings
- Steamed jasmine rice – The classic choice for soaking up sauce.
- Fried rice – Adds extra texture and flavor.
- Lo mein noodles – For a heartier meal.
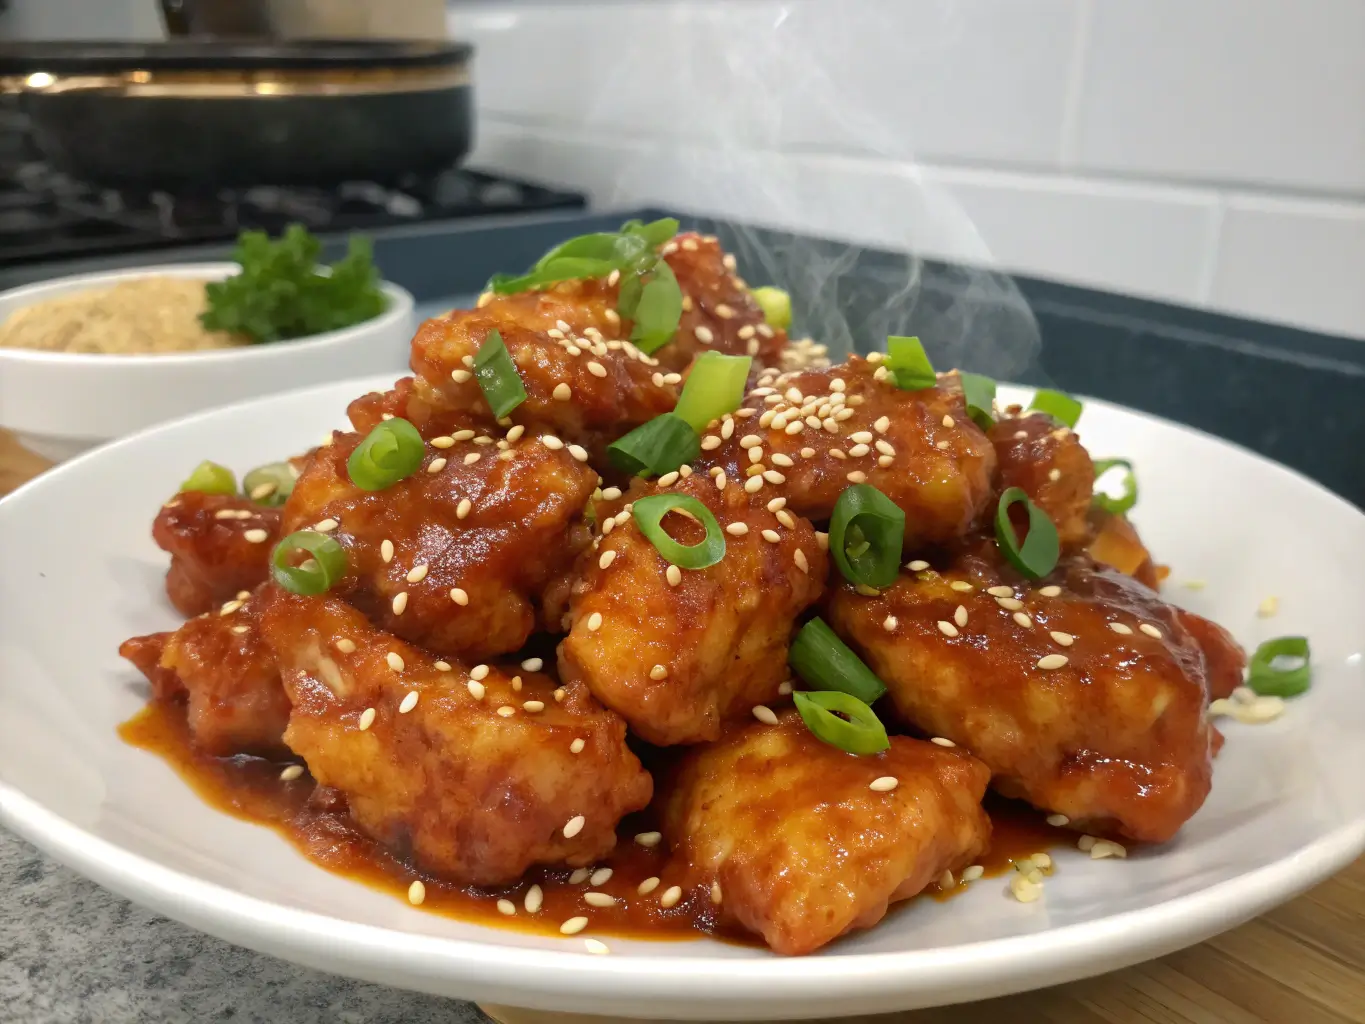
Garnishes for Wow Factor
- Sesame seeds – Adds nutty crunch.
- Sliced green onions – Fresh, vibrant contrast.
- Fresh cilantro or basil – Brightens the dish.
Side Dish Suggestions
- Egg rolls or spring rolls – A crunchy appetizer.
- Asian cucumber salad – Refreshing contrast.
- Edamame – Simple, protein-packed starter.
Storage & Make-Ahead Tips
Storing Leftovers
- Fridge: Store in an airtight container for up to 3 days.
- Reheating: Warm in a skillet over medium heat to retain crispiness (microwaving can make chicken soggy).
Freezing for Future Meals
- Freeze sauce separately – Prevents chicken from getting mushy.
- Thaw overnight – Reheat in a skillet with a splash of water.
Meal Prep Shortcuts
- Pre-cut veggies – Store in the fridge for quick assembly.
- Pre-mix sauce – Keeps for up to 5 days refrigerated.
- Batch-cook chicken – Reheat in the oven or air fryer to maintain crispness.
FAQ Section
Q: Can I use store-bought sweet and sour sauce?
A: Yes, but homemade tastes fresher and less sugary. If using store-bought, jazz it up with a squeeze of lime or ginger.
Q: Can I make this gluten-free?
A: Absolutely! Swap soy sauce for tamari and ensure your cornstarch is GF-certified.
Q: Is dark meat better than chicken breast?
A: Thighs stay juicier, but breast works well if not overcooked. For best results, brine chicken breast in saltwater for 15 minutes before cooking.
Q: Can I make this ahead for a party?
A: Yes! Cook the chicken and sauce separately, then combine just before serving to keep the chicken crispy.
Conclusion
This Sweet and Sour Chicken is a foolproof way to satisfy cravings without sacrificing quality. Crispy, saucy, and bursting with flavor, it’s a dish that’ll have everyone asking for seconds. With endless customization options and easy make-ahead tricks, it’s perfect for busy weeknights or weekend feasts.
Pro tip: Double the sauce—you’ll want extra for drizzling!
Give it a try and let us know how it turned out—tag us on social media or drop a comment below! 🍍🔥