
Classic Yule Log Chocolate Cake: A Festive Holiday Dessert
Introduction
Few desserts embody holiday spirit as beautifully as the Classic Yule Log Chocolate Cake, also known as Bûche de Noël. With its rolled sponge cake, rich chocolate filling, and whimsical decoration resembling a wooden log, this dessert is a show-stopper that blends artistry with indulgence. Its light, airy sponge and creamy frosting deliver flavors that are festive, comforting, and celebratory all at once.
Making a Yule Log may seem intimidating, but with the right method and guidance, you can create a bakery-quality centerpiece in your own kitchen. This recipe balances elegance with approachability, guiding you through each step—rolling the sponge, whipping the cream, spreading the frosting, and decorating it to look like a snowy winter log. The result is a dessert that not only tastes divine but also impresses every guest at the table.
If you’re searching for a dessert that will wow during Christmas, New Year’s, or any winter gathering, this recipe has everything you need: timeless charm, decadent flavor, and a festive presentation.
A Short History of the Yule Log Cake
The Yule Log has roots in European tradition. Before modern times, families in Europe would burn an actual “Yule log” in their fireplace as a symbol of warmth, prosperity, and protection during the winter solstice. When the practice of large hearth fires began to fade, bakers in 19th-century France reinvented the tradition by creating an edible version of the log—thus, the Bûche de Noël was born.
Decorated with frosting, meringue mushrooms, and powdered sugar to resemble snow, the cake quickly became a festive staple across Europe and beyond. Today, it remains a holiday classic, cherished for its symbolism as much as its taste.
Why You’ll Love This Recipe
- Stunning centerpiece that doubles as decoration and dessert.
- Light but rich flavor with airy sponge and creamy chocolate filling.
- Make-ahead friendly for stress-free holiday hosting.
- Customizable decorations from powdered sugar snow to festive holly sprigs.
- Beginner-accessible with step-by-step rolling instructions.
Ingredients & Equipment
For the Chocolate Sponge Cake:
- ½ cup (65 g) all-purpose flour
- ¼ cup (25 g) unsweetened cocoa powder
- 1 teaspoon baking powder
- ¼ teaspoon salt
- 4 large eggs, separated
- ½ cup (100 g) granulated sugar
- 2 tablespoons milk
- 1 teaspoon vanilla extract
For the Chocolate Filling:
- 1 cup (240 ml) heavy cream
- 2 tablespoons powdered sugar
- 2 tablespoons unsweetened cocoa powder
- 1 teaspoon vanilla extract
For the Chocolate Frosting:
- ½ cup (115 g) unsalted butter, softened
- 1 ½ cups (180 g) powdered sugar
- ¼ cup (25 g) unsweetened cocoa powder
- 2–3 tablespoons milk
- 1 teaspoon vanilla extract
Decorations (Optional but Recommended):
- Powdered sugar (for snow effect)
- Chocolate shavings
- Fresh holly leaves or sugared cranberries
- Meringue mushrooms (store-bought or homemade)
Equipment:
- 10×15-inch (25×38 cm) jelly roll pan
- Parchment paper
- Whisk and mixing bowls
- Hand or stand mixer
- Offset spatula
- Kitchen towel (for rolling the sponge)
Step-by-Step Instructions
1. Prepare the Sponge Cake
Preheat your oven to 350°F (175°C). Line a jelly roll pan with parchment paper. In a bowl, sift together flour, cocoa, baking powder, and salt. In another bowl, beat egg yolks with sugar until pale and thick. Stir in milk and vanilla.
In a separate bowl, whip egg whites until stiff peaks form. Gently fold the egg whites into the yolk mixture, then fold in the dry ingredients. Spread batter evenly into the prepared pan and bake for 12–15 minutes, until springy to the touch.
2. Roll the Cake While Warm
Turn the baked cake onto a clean kitchen towel dusted with powdered sugar. Carefully peel off the parchment paper. Starting from the short end, roll the cake (with the towel inside) into a log shape. This step helps the sponge “remember” its rolled shape. Allow it to cool completely.
3. Make the Filling
Whip the cream, powdered sugar, cocoa, and vanilla together until stiff peaks form. Keep chilled until ready to use.
4. Fill the Cake
Once the sponge has cooled, gently unroll it. Spread the whipped chocolate cream filling evenly across the surface, leaving a small border around the edges. Reroll the cake carefully without the towel this time. Place seam-side down on a serving platter.
5. Frost the Log
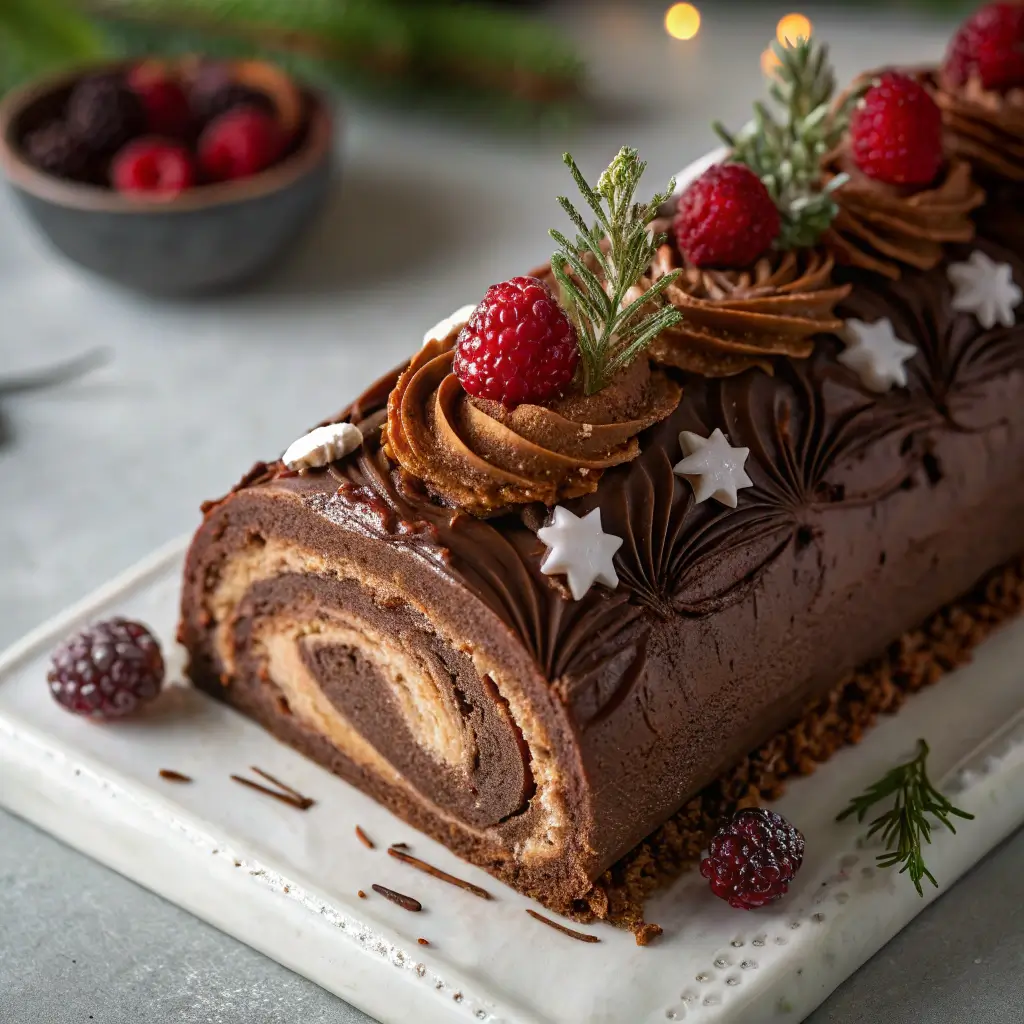
Beat together butter, powdered sugar, cocoa, milk, and vanilla until smooth and spreadable. Cover the rolled cake with frosting, using a spatula to create wood-like ridges. For a more natural look, cut a small piece of the log off at an angle and attach it to the side to mimic a branch.
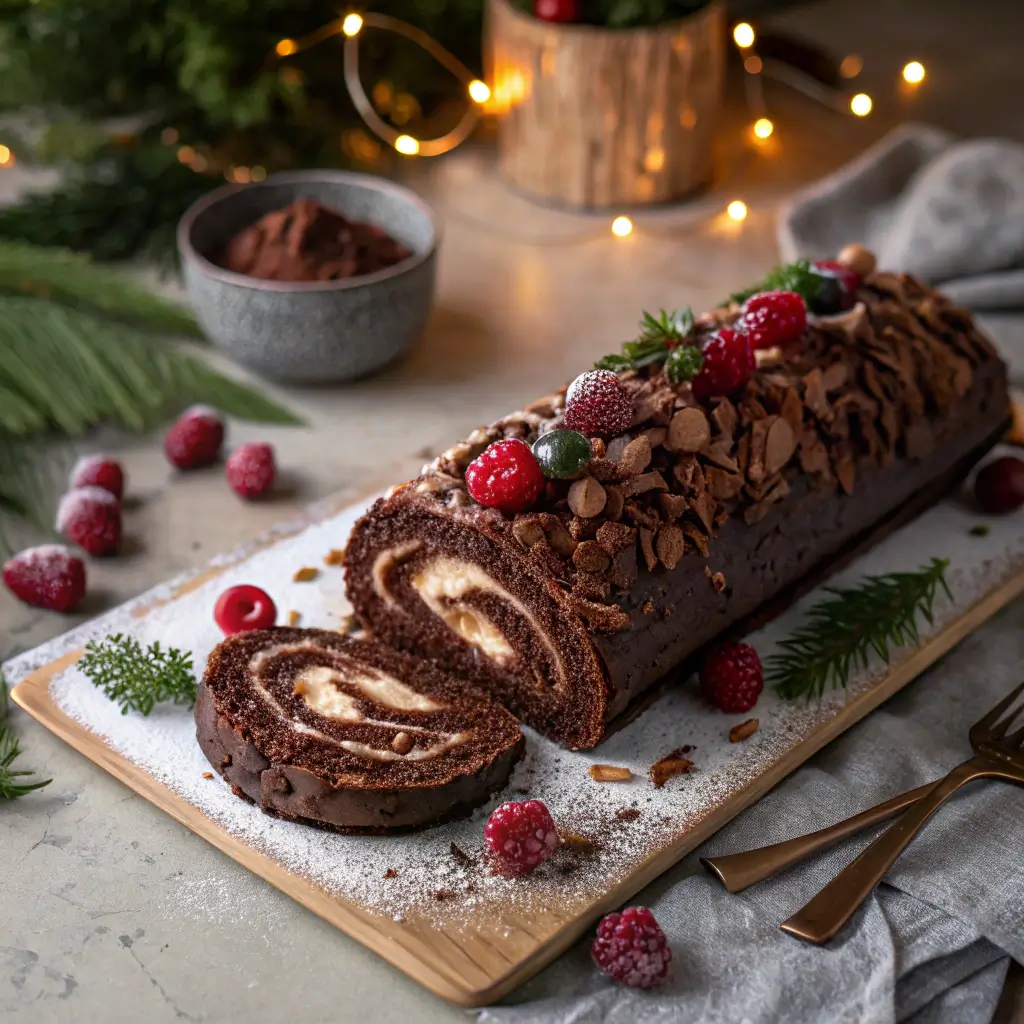
6. Decorate
Dust with powdered sugar for snow, garnish with chocolate shavings or berries, and add meringue mushrooms if desired. The finished cake should resemble a rustic log ready for a winter forest feast.
Expert Tips & Troubleshooting
- Cracks in the sponge? Don’t panic—frosting covers imperfections beautifully.
- Dry sponge? Avoid overbaking. The cake should be springy, not firm.
- Difficulty rolling? Roll the cake while warm with a towel; this prevents cracks later.
- Runny filling? Ensure the cream is whipped to stiff peaks before spreading.
Variations & Customizations
- Mocha Yule Log: Add a teaspoon of instant coffee granules to the frosting for a coffee-chocolate twist.
- White Chocolate Filling: Replace cocoa in the filling with melted white chocolate for contrast.
- Fruit-Filled Log: Add a layer of raspberry jam beneath the whipped cream for tartness.
- Gluten-Free Version: Swap flour for a gluten-free baking blend.
Serving & Presentation Ideas
- Serve on a rustic wooden board for maximum effect.
- Add sugared cranberries and rosemary sprigs for a wintry forest look.
- Lightly torch the frosting edges for a roasted, wood-bark appearance.
- Slice into thick rounds and serve with whipped cream or ice cream.
Storage & Make-Ahead Tips
- Refrigerate: Store covered in the fridge for up to 3 days.
- Freezing: Freeze the unfrosted rolled cake (tightly wrapped) for up to 2 months. Thaw before filling and decorating.
- Make-ahead: Bake and roll the sponge a day ahead, then fill and frost the next day for stress-free serving.
Frequently Asked Questions
Q: Can I make the Yule Log without a jelly roll pan?
Yes, use a standard baking sheet with raised sides, but the cake may be thinner and bake faster.
Q: How do I get the frosting to look like bark?
Drag a fork lightly through the frosting to mimic tree bark texture.
Q: Can I use whipped cream frosting instead of buttercream?
Yes, but whipped cream frosting is less stable for shaping; it’s best for filling rather than coating.
Conclusion
The Classic Yule Log Chocolate Cake isn’t just dessert—it’s a holiday tradition. With its festive design, decadent flavor, and rich history, it brings warmth and joy to any winter gathering. While it may look intricate, the step-by-step process ensures that bakers of all skill levels can achieve a stunning result.
From the moment you place this cake on the table, guests will be captivated. And once they taste the light sponge paired with luscious filling and frosting, they’ll be asking for it year after year. This recipe proves that sometimes the most impressive desserts are the ones tied to timeless traditions.