Categories
How to ...

How To Make Incredible Pan Sauces

If you want to elevate your cooking skills to a new level and add a whole lot more to your gastronomy repertoire, learn how to make a simple pan sauce. With this technique in your cooking bag of tricks, you can turn a simple pan-fried steak into a mouth-watering meal, a plain boneless chicken breast into a delicious feast, or a modest pork chop into a scrumptious banquet. Ok, maybe I’m stretching a bit but check this out.

Restaurants chefs use this technique all the time. Basically they cook something in a sauté pan over pretty high heat until it’s done and leaves a bunch of brown caramelize bits of “stuff” in the pan. You look at this “stuff” in the pan and say to yourself, “Now how am I going to clean this ‘stuff’ off the pan? What a mess! I wish I had used a non stick pan.”

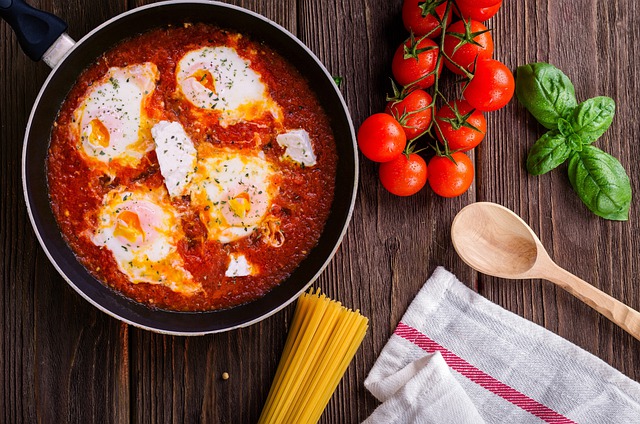
The “stuff” has a name, it’s called “fond” and you want that “fond” stuck to your pan because it is packed with incredible flavors. It’s also easy to remove by adding a little liquid to the pan and using a wooden spoon to dissolve it. This is called deglazing and can be done with wine, brandy, fortified wines, stock, cider, fruit juices or most typically a combination of two. Just be careful if you use wine to remove the pan from the heat so the alcohol doesn’t ignite and blow up in your face. I’ve spoken with chefs who have seen this happen.

The next steps are to continue to cook the liquid in the pan until it is reduced by half and finish by adding several pats of butter to thicken and enhance the flavor of the sauce. If you ever knew how much butter professional chefs use in restaurants to “enhance” flavor, you would be amazed. I sometimes think they make their dishes too rich because I get that uncomfortable “too full” feeling later on, but then again, it’s so good while you’re dining. Now those are just the basics.

To create more complexity to the sauce you’ll want to add some aromatics like garlic or shallots for a subtle but additional layer of flavor. Then you might want to add some additional ingredients such as mushrooms, mustards, chutneys, herbs and/or spices to give even more complexity and flavor.

For more information on making classic and quick pan sauces at home including what kind of pan to use, how much deglazing liquid to use and two example recipes for the same sauce, one classic and the other quick go to http://www.reluctantgourmet.com/pan_sauces.htm

Categories
How to ...

How to Cook Turkey on Natural Gas Grills

The holidays bring with them thoughts of carving and serving delicious turkey dinners to your family and friends. Tradition has its fans, but perhaps this year you’d like to try a twist to your turkey recipe. If you have a gas grill and enjoy the smoky flavor of grilled meats, why not try grilling your turkey this year? It’s not only possible, it is rather simple. And it delivers a delicious flavored bird to your table. Plus, having the turkey on the grill instead of the oven leaves you with all the room you need to prepare the rest of your dinner in less time.

When you are ready to buy your turkey, the first thing to consider is the size of your grill. You don’t want a bird that is so enormous that it can’t fit on the grill rack. Ideally, the turkey you select should sit on the grill and the lid should close without touching the bird. If this isn’t possible, don’t worry, you can still grill your turkey. You’ll need some heavy duty aluminum foil and either a V shaped grill stand or another metal cooking instrument that you can safely use to prop open the lid of the grill.

Prepare and stuff the turkey as you normally would. Place it on the grill so that it is positioned over one burner that you can turn off. Turn that burner off and the other burner or burners on. Since you can’t really “flip” a turkey, you want the turkey to cook by indirect heat, not by a direct flame underneath it.

You get the smoky flavor by using wood chips. If you haven’t used wood chips before, they’re easy to use. You soak them in water so that as they dry out from the heat of the grill, they’ll release a flavored smoke that infuses the turkey. You can purchase a tray that is designed for putting wood chips on the grill or you can make one yourself from heavy duty aluminum foil. Take the wood chips out of the water and put them into your tray. Place the tray on the grill over the lit burner.

Next, close the lid fully if possible. If not possible, prop the lid up just enough to keep it from touching the turkey. Then cover the remainder of the opening with aluminum foil. If heat gets out you will probably have to cook the turkey longer. However, the foil creates enough of a barrier so the smoke is kept circulating inside the grill and flavoring the turkey.

The time required to cook the turkey will vary depending on whether or not you were able to close your grill completely. If you can, it will take less time. If you can’t, you might want to increase the heat on the other burner or burners to try to make up for the lost heat by having to prop open the grill. After a couple of hours, rotate the turkey 180 degrees to help ensure even cooking.

As with any method of cooking poultry, it’s important to make sure that the internal temperature of the meat reaches 160 degrees Fahrenheit. Ideally you should use a meat thermometer to monitor the temperature as you cook. If you don’t have one, then you’ll have to check the readiness by poking the thigh with a fork or skewer. If the juices that run out are clear and the turkey has turned a nice golden-brown color, then you are ready to remove it from the grill. Consider glazing the turkey with a sauce you use on other meats, or possibly adding barbecue sauce to the traditional cranberry sauce as a condiment. Don’t be afraid to experiment – enjoy the new twist you’re putting on an old family tradition.

Categories
How to ...

How to cook a turkey

The most important thing to keep in mind is that a turkey takes a long while to cook through to the bone…and keeps on cooking once you remove it from the oven. Make sure to bake, braise or roast the bird at a high enough temperature to keep it safe to eat and don’t overcook it. Don’t leave your turkey in the oven to keep it warm while you get the rest of the dinner ready to serve. Take it out as soon as it’s done, let it cool outside the oven for about 20 minutes and then carve away. You’ll see the difference immediately when a turkey is prepared properly: the dark meat soft enough to break apart with a fork – the white meat moist and tasty. The secret is all in knowing how to buy and cook a delicious turkey! We’re here to help you learn how to cook a turkey.

How big a turkey should you buy? You’ll need at least 1 to 1½ pounds of turkey per person if you’re buying the whole bird, fresh or frozen. Of course, it’s always best to go bigger. (After all, there are at least 50 ways to serve your turkey leftovers, including a winter store of turkey soup.) How long to cook? Preheat the oven to 325°F (160°C) then place the bird in the oven to roast.

A thought to consider–Great chefs suggest trying out your skills with a smaller bird before attempting to produce a holiday masterpiece. Like any other skill, perfecting a turkey recipe takes practice. Very few cooks can claim that their first turkey was perfect…but with every attempt you get more comfortable with what you’re doing and the results keep getting better.

Simple steps how to cook a turkey:

Allow about 15 minutes of cooking time per pound – about 45 minutes per kilo unstuffed. It will take a bit longer, about 20 minutes per pound or an hour per kilo, if the bird is cooked with stuffing.

  1. Preheat oven to 325. Remove the wrapper to see how much the turkey weighs and determine approximate cooking time. Remove the giblet bag and the neck from the turkey cavity. Wash the turkey inside and out and pat skin dry with paper towels.
  2. Place turkey breast side up on a rack in a shallow (about 2 inches deep) roasting pan. Insert meat thermometer in thigh. Add 1/2 cup water to the bottom of pan, if desired.
  3. Cover turkey loosely with a tent of heavy-duty aluminum foil. Roast the turkey until temperature in the thickest part of the thigh reaches 180°F. Cooking time will vary. For example, a 20 pound turkey will take 4 1/4 to 5 hours to cook, check the temperature on the thermometer after 4 1/4 hours.
  4. Meanwhile, mix the stuffing or dressing. Place in a casserole and pop it into the oven during the last hour or so of roasting time.
  5. Remove the foil tent after 1 to 1 1/2 hours of cooking time to brown the skin. Brush with vegetable oil to enhance browning, if desired.
  6. A whole turkey is done when the temperature reaches 180°F. The thigh juices should run clear (not pink) when pierced with a fork and the leg joint should move freely.
  7. Allow the turkey to set 20 to 30 minutes before carving to allow juices to saturate the meat evenly.
    Note: Cooking times do vary. Why? There are many reasons – oven temperature may not be completely accurate, the turkey may be very cold or partially frozen, and/or the roasting pan may be too small which inhibits the flow of heat. The USDA highly recommends use of a meat thermometer to determine doneness of turkey. This is an important tool in learning how to cook a turkey.

Stuffed Turkey:
For uniform cooking results, the USDA recommends cooking the stuffing outside of the bird (see step 4 above) If you insist on stuffing the turkey, stuff loosely and follow the steps below.

  1. See step one above
  2. Mix stuffing and lightly fill cavity. Allow 1/2 to 3/4 cup stuffing per pound of turkey. It is safer to understuff than to overstuff the turkey. Stuffing expands during cooking. Refrigerate any leftover stuffing and bake in greased casserole during the last hour of turkey roasting time.
  3. Place turkey breast side up on a rack in a shallow (about 2 inches deep) roasting pan. Insert meat thermometer in thigh (see Turkey Safety: Using a Thermometer). Add up to 1/2 cup water to the bottom of the pan, if desired.
  4. Cover turkey loosely with a tent of heavy-duty aluminum foil. Cooking time takes longer for a stuffed turkey. For example, a 20 pound stuffed turkey will take 4 1/4 to 5 1/2 hours to cook.
  5. Remove the foil cover after about 1 to 1 1/2 hours of cooking to brown the skin. Brush with vegetable oil to enhance browning, if desired.
  6. A whole turkey is done when the temperature in the thickest part of the inner thigh reaches 180°F and the stuffing is 165°F. The juices should run clear (not pink) when a long-tined fork is used to pierce the thickest part of the thigh.
  7. Check the internal temperature of the stuffing. Insert the thermometer through the cavity into the thickest part of the stuffing and leave it for 5 minutes. Or use an instant red thermometer which will register the temperature after 15 seconds. The stuffing temperature will rise a few degrees after the turkey is removed from the oven. If the center of the stuffing has not reached 165°F after stand time, return the turkey to the oven and continue cooking.
Categories
How to ...

How To Cook A Tender Juicy Steak

You invest a lot of time and money into the steaks for a special occasion and when dinner time comes, they are tough. What happened? How can you cook steaks as tender as your favorite restaurant?

The first step to cooking a good steak is to choose the right grade of steak. The top quality beef is graded USDA Prime and commands top prices. USDA Prime grade meats are sold to the restaurant industry and specialty markets and are not as likely to be found at your local grocery chain. The next grade of beef is USDA Choice. USDA Choice is tender, flavorful and only slightly lower in quality than USDA Prime. The meat is well marbled with fat and will be tender and juicy when properly prepared. USDA Choice makes up about 70% of all graded beef and is readily available in your supermarket. USDA Good graded beef is an acceptable grade of beef that has only minimal marbling of fat. It is leaner, but may not be as tender as USDA Prime or Choice.

Next, look at the color and texture of the meat. A good steak should be firm to the touch, moist, and bright in color. It should be well marbled with thin streaks of white fat throughout and a thin crust of steak on the outside. In our fat conscious society, we tend to look for lean cuts of meat, but the thin streaks of white fat marbled throughout the meat are the key to a tender juicy steak.

The most tender and juicy steaks come from the sirloin, the short loin, and the rib. These steaks include the sirloin steaks, porterhouse steaks, t-bone steaks, rib steaks, delmonico steaks, and the filet mignons. Steaks containing bone will weigh more than those without, but the bone adds flavor to the steak.

Aging is a desirable process that intensifies the flavors and makes the meat more tender. Aged steaks are more expensive and usually only found in high end supermarkets and specialty markets. An aged steak is recognizable by its darker color.

Once you have purchased your steak, you can further increase the tenderness and juiciness by marinating it. Try a marinade made of ½ cup each good wine and olive oil mixed 2 Tablespoons of lemon juice or herb vinegar. Add any seasonings that you like such as garlic, freshly ground pepper, onion, or herbs. Place the steak in a ziplock bag, pour in enough marinade to just cover it, and refrigerate overnight. Marinating a steak like this will add flavor and tenderness. If you routinely store steak in the freezer before cooking, try pouring the marinade over the steak before freezing. The steak will marinate when thawing and be ready to cook.

There are meat tenderizers available to sprinkle onto your steak, and they certainly do tenderize the meat; however, meat tenderizers can sometimes over tenderize the meat, changing the texture of the meat into mush. If you should choose to go this route, do it carefully.

When ready to cook, slash through the outside fat layer on the steak in a few places to prevent curling, but do not cut into the meat. The more tender steak cuts can be broiled, grilled, or pan fried. Less tender cuts should be pan fried or slow braised. Steak should never be cooked in liquid. When pan broiling, use a very heavy skillet such as an iron skillet or griddle and heat the pan before adding the meat. The heavy metal will hold the heat for proper heat distribution and not cool down when the steak is added. A hot pan will quickly sear the outside, trapping the moisture inside.

When cooking, try to turn the steak only once. Cook the meat until browned on one side and half done, then turn and finish the other side. Turning too often will stew the meat rather than searing it and produce a less juicy steak. When the steak is done, remove from the pan and allow to rest for a few minutes before serving.

While the meat rests you can make a sauce with the pan drippings if desired. Use your favorite sauce, or fry mushrooms and onions in the pan. When nearly done, add a tablespoon each of butter and flour and cook until lightly browned. Add a splash of wine and loosen any bits that may be stuck to the bottom of the pan. Allow to cook until thick, taste and adjust seasonings, and serve over the steak. Enjoy!

Categories
How to ...

How to Clean and Fillet Fish

Fish is one of the most wholesome foods that man can eat. In fact, people have been eating fish throughout human history. These days, many cooks yearn to add fish to their repertoire, but the whole process of cleaning and filleting fresh fish is a little scary to them. The process of cleaning and filleting fresh fish is relatively simple once the steps are understood.

 To begin, you must clean your fresh fish properly in order to maintain it's quality during the remaining steps of processing.  First, use a knife or fish scaling tool to remove all of the scales.  Removing the scales early on is a key to easy fish cleaning.  Next, remove the fish head by cutting just behind the first set of fins.  Now, insert your sharp knife into the area where you just removed the head and make a slit in the belly of the fish.  You will want to slit the fish belly all the way down to the vent next to the tail.  This should open up the cavity of the fish and you can pull or cut away any viscera or organs from inside the fish. The next step is to cut away any additional fins that the fish may have.  Do this by cutting into the fish in a circular motion around the fins and remove them.  Finally, rinse the fish body and cavity under cold, running water.  Now that the fish has been properly cleaned, you can move on to filleting.

 Begin the fish filleting process by laying the fish on one side and inserting your knife into the fish body almost to the backbone.  Guide your knife along the backbone, exposing the fillet as you cut.  You will have to lift and separate the flesh from the bone as you cut.  Next, repeat this process for the other side.  Once you have created the two fish fillets, place them skin side down and cut through the flesh next to the tail.  Do not cut through the skin next to the tail, as you will hold onto this skin as you separate the skin from the flesh.  Insert your fillet knife between the flesh and the skin and use a back and forth motion to separate the two.  Rinse the fillets with cold water and be sure to dry them before storing or using.

 These simple and easy steps are all that it takes to make the most out of fresh fish.  With these steps in mind you can prepare fresh fish for any meal.
Categories
How to ...

How To Choose The Perfect Bread Maker

Bread makers are extremely popular. The average person can make delicious, homemade bread quite easily with a bread maker. Even with the ease of a bread machine, you must still use caution when adding the ingredients, even if you use a mix. You can make a variety of shapes and sizes of loaf with a bread machine. Many people use a bread machine to simply mix the ingredients then bake the loaf in a traditional oven. Sizes range from one pound to two pounds or more, and you will most likely choose between a square or round loaf pan.

Some bread makers will have a preheat cycle to heat the ingredients before baking. If you want your bread to rise properly, choose a bread maker that does not heat before time to bake the bread. Bread makers will generally have separate settings for different types of bread. There may be settings for wheat or French bread, and you will be able to choose the doneness of the bread such as a light, medium, or dark setting. There will also normally be a regular or rapid bake cycle. It is desirable to have a window in the top or side of the bread machine to allow you to see the progress of your bread while it is baking.

There are a variety of options from which to choose in bread makers, so you may first want to consider how much space you have to store your new machine. Bread makers come in a variety of sizes, so choose one that you can store easily. You should choose the capacity of the bread maker based upon how big your family is and how much bread they eat. You can choose a bread maker with a delay timer which will allow you to place the mix in the bread maker before you leave home each day and the bread will be ready when you return. If you want your bread maker to prepare the dough but not cook it, you will need to find a bread maker with this feature. Choose a bread maker that will alert you when it is time to add additional ingredients such as fruit or nuts. You will also want a “keep warm” feature in case you are gone when the bread is finished. Look for crust control features and special setting for fruits, nuts, cheese, and vegetables.

Study the warranty very carefully to make sure you will be able to get service and replacement parts if necessary. Keep in mind that if your family consumes a small amount of bread now, once you purchase your new bread maker that consumption is likely to increase dramatically. Choose a slightly larger size that you anticipate needing. Remember that the keep warm feature is great, but if you leave the loaf in the bread maker for an extended period of time it may become soggy and flat. A bread maker is a wonderful addition to your home. Nothing compares to the smell of freshly baked bread from your very own kitchen.