
Tall Layered Birthday Cake Recipe – Impressive, Elegant & Celebration-Ready
Introduction
A Tall Layered Birthday Cake is the ultimate showstopper for special celebrations. With multiple stacked cake layers and smooth frosting in between, this cake creates dramatic height and stunning presentation. Whether you’re celebrating a milestone birthday, hosting a big party, or simply want a centerpiece dessert, a tall cake instantly elevates the event.
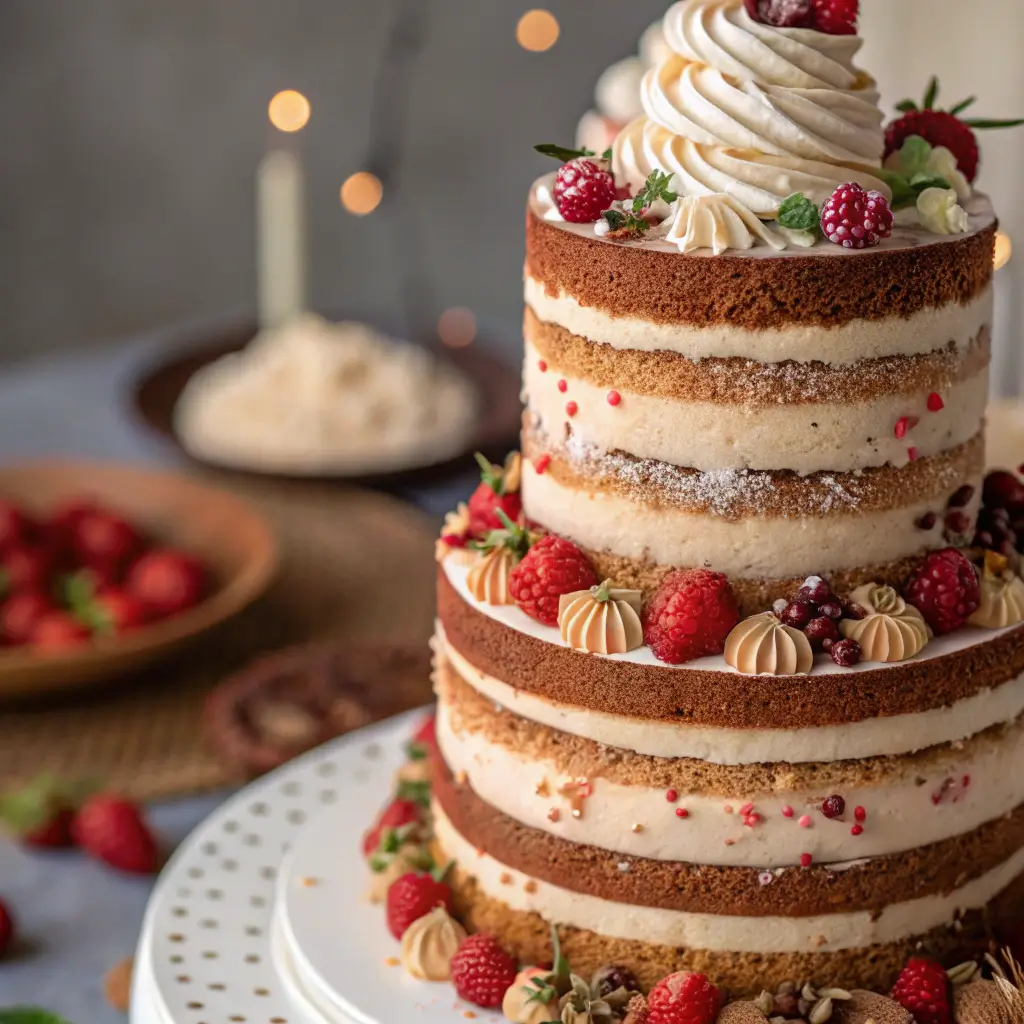
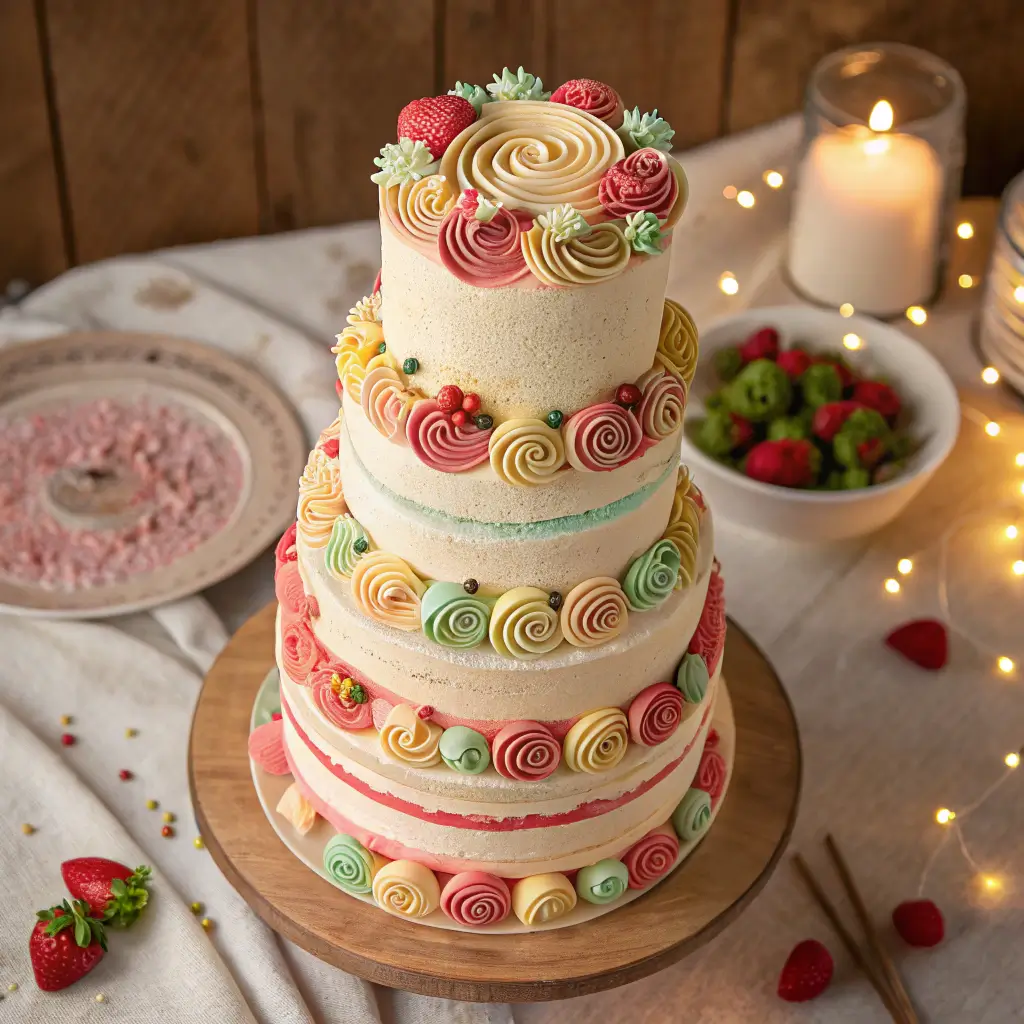
Unlike standard two-layer cakes, a tall layered cake typically features four to six layers, giving it a luxurious bakery-style appearance. Each slice reveals beautiful, even layers separated by creamy frosting, jam, or filling. The result is not only visually impressive but also perfectly balanced in flavor and texture.
While it may look complicated, creating a tall cake at home is completely achievable with proper planning, stable frosting, and careful stacking. With the right techniques, you can bake a tall layered birthday cake that looks professional and tastes unforgettable.
Why Choose a Tall Layered Cake?
Tall cakes make a bold statement. Their height adds elegance and drama, making them perfect for milestone birthdays like 18th, 21st, 30th, or 50th celebrations. They also allow you to experiment with multiple flavors and fillings while maintaining structural beauty.
The extra layers provide more frosting-to-cake balance in every bite, making each slice moist and flavorful.
Why You’ll Love This Recipe
- Stunning, impressive height
- Soft and moist cake layers
- Perfect frosting-to-cake ratio
- Ideal for large gatherings
- Customizable fillings and flavors
- Bakery-style presentation at home
Ingredients and Equipment
For the Vanilla Cake Layers (6 Thin Layers)
- 4 cups (500 g) all-purpose flour
- 3 teaspoons baking powder
- ½ teaspoon salt
- 1 ½ cups (340 g) unsalted butter, softened
- 2 ½ cups (500 g) granulated sugar
- 6 large eggs, room temperature
- 2 tablespoons vanilla extract
- 1 ½ cups (360 ml) whole milk, room temperature
You can substitute chocolate cake if preferred.
For the Buttercream Frosting
- 3 cups (675 g) unsalted butter, softened
- 8–9 cups (960–1080 g) powdered sugar
- 5–6 tablespoons milk
- 2 teaspoons vanilla extract
- Pinch of salt
Optional Fillings
- Strawberry jam
- Chocolate ganache
- Fresh fruit slices
- Caramel sauce
Essential Equipment
- Three 8-inch (20 cm) cake pans (bake in batches if needed)
- Electric mixer
- Offset spatula
- Bench scraper
- Cake turntable
- Cake dowels (optional for extra support)
Using a turntable makes smoothing much easier.
Step-by-Step Instructions
Step 1: Bake the Cake Layers
Preheat oven to 350°F (175°C). Grease and line cake pans with parchment paper.
Whisk flour, baking powder, and salt together.
In a large bowl, beat butter and sugar until light and fluffy (about 4–5 minutes).
Add eggs one at a time, mixing well after each addition. Stir in vanilla.
Alternate adding dry ingredients and milk, mixing until smooth.
Divide batter evenly between pans. Bake for 25–30 minutes or until a toothpick inserted comes out clean.
Cool completely.
If baking thicker layers, slice each layer in half horizontally to create more height.
Step 2: Prepare the Buttercream
Beat butter until creamy.
Gradually add powdered sugar on low speed.
Add vanilla, salt, and milk. Beat until smooth and fluffy.
The frosting should be thick enough to support multiple layers.
Step 3: Level the Cake Layers
Use a serrated knife to level each cake layer if domed.
Flat layers are essential for stability in tall cakes.
Step 4: Assemble the Tall Cake
Place the first layer on a cake board.
Spread an even layer of frosting (or filling).
Repeat stacking and frosting until all layers are used.
Keep layers aligned and centered.
For extra stability in very tall cakes, insert a dowel through the center.
Step 5: Apply Crumb Coat
Spread a thin crumb coat over the entire cake.
Chill for 30 minutes to firm up.
Step 6: Final Frosting and Smoothing
Apply a generous layer of frosting to the top and sides.
Use a bench scraper to smooth evenly while rotating the turntable.
Chill briefly for a sharper finish.
Expert Tips for Building Tall Cakes
- Chill layers before stacking for easier handling.
- Use a kitchen scale to divide batter evenly.
- Keep frosting firm for structural support.
- Refrigerate between stacking if cake feels unstable.
- Use dowels for cakes taller than 6 layers.
If frosting becomes too soft, chill briefly before continuing.
Creative Decoration Ideas
Tall cakes offer endless decoration possibilities:
- Add a chocolate drip effect.
- Create ombré frosting layers.
- Pipe vertical buttercream stripes.
- Add sprinkles or edible pearls.
- Top with fresh flowers or fruit.
Minimalist smooth white frosting with a bold topper also looks elegant.
Serving and Presentation
Slice with a long, sharp knife and wipe between cuts to maintain clean layers.
Because of its height, cut smaller slices for easy serving.
This cake pairs beautifully with coffee, milk, tea, or party beverages.
Storage and Make-Ahead Tips
Store in an airtight container at room temperature for up to 2 days, or refrigerate for up to 5 days.
Cake layers can be baked and frozen for up to 2 months.
Allow cake to sit at room temperature before serving for best texture.
Frequently Asked Questions
How many layers make a cake “tall”?
Typically 4–6 layers or more.
Do I need cake dowels?
For very tall cakes, dowels add extra stability.
Can I mix flavors?
Yes, alternate chocolate and vanilla layers for contrast.
How do I prevent sliding?
Use thick frosting and chill between stacking.
Conclusion
This Tall Layered Birthday Cake Recipe delivers impressive height, beautiful layers, and celebration-worthy flavor. Elegant, dramatic, and customizable, it’s the perfect choice for milestone birthdays and large gatherings.
With careful stacking and smooth frosting, you can create a stunning bakery-style cake that becomes the centerpiece of any celebration 🎂✨