
Red Velvet Cupcakes with Cream Cheese Frosting: A Classic Treat for Any Occasion
Introduction
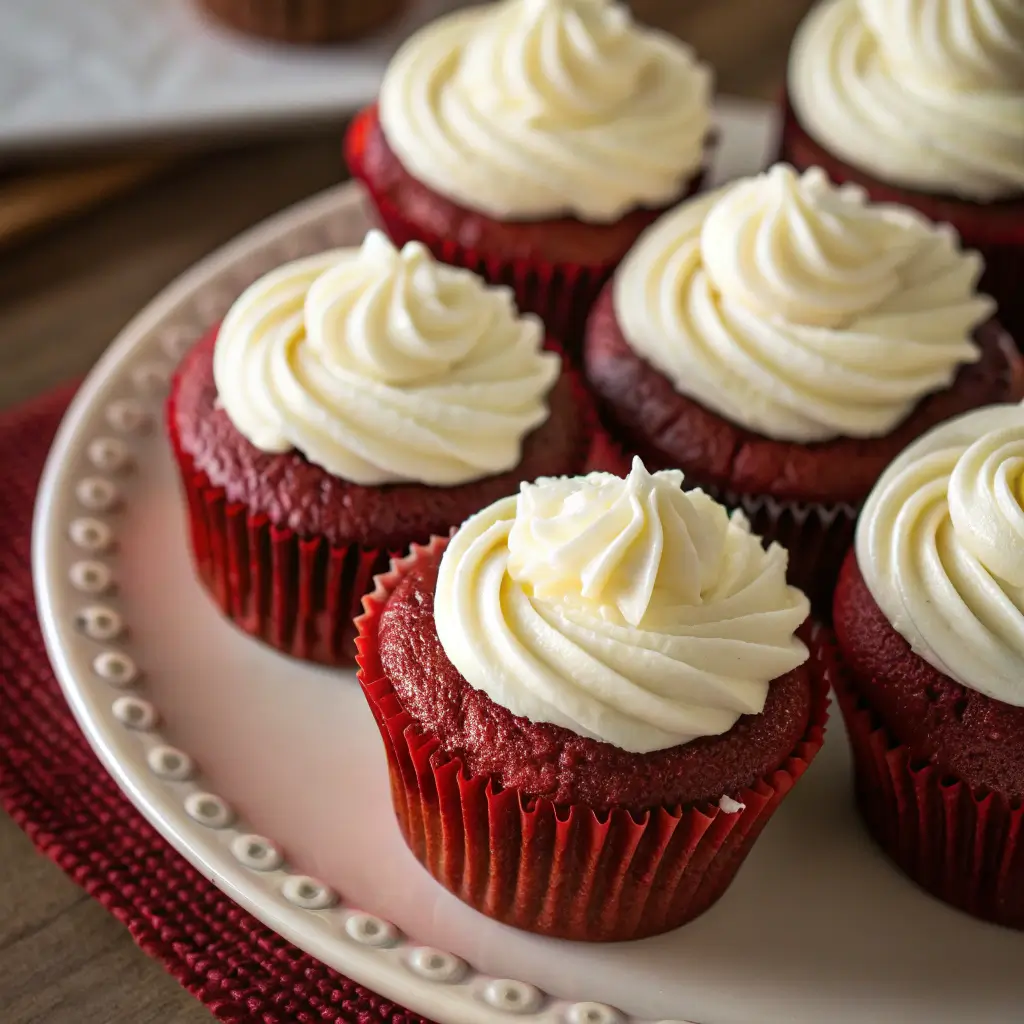
Few desserts have the same iconic appeal as Red Velvet Cupcakes with Cream Cheese Frosting. Their striking red color, tender crumb, and tangy-sweet frosting make them a show-stopper at birthdays, weddings, holidays, or even casual family gatherings. More than just eye-catching, these cupcakes offer a unique flavor profile that sets them apart from standard chocolate or vanilla cakes. With a subtle cocoa undertone, a hint of tang from buttermilk, and the creamy richness of cream cheese frosting, red velvet cupcakes are a true bakery-style treat you can make at home.
These cupcakes are not just about looks—they’re also incredibly satisfying to eat. The moist and fluffy base contrasts beautifully with the smooth, tangy frosting, creating a balance of flavors that keeps people coming back for more. Best of all, the recipe is approachable, requiring simple pantry staples and basic baking techniques. Whether you’re a beginner baker or an experienced pro, this recipe guarantees cupcakes that are as delightful to make as they are to eat.
A Short History of Red Velvet Cake
The origins of red velvet cake are a little mysterious, but most food historians trace it back to the early 20th century in the United States. The term “velvet” was originally used to describe cakes with a soft, smooth crumb made possible by adding cocoa powder. The “red” hue came from a natural chemical reaction between cocoa, acidic ingredients like vinegar or buttermilk, and the leavening agents.
By the mid-20th century, red velvet cake gained popularity in the South and eventually across America, becoming a staple in bakeries and home kitchens. The introduction of red food coloring in recipes helped intensify the cake’s signature color, making it instantly recognizable. Today, red velvet cupcakes are a fun, individually sized version of this iconic dessert, perfect for portion control and presentation.
Why You’ll Love This Recipe
- Moist and tender crumb thanks to buttermilk and a touch of vinegar.
- Bakery-style frosting that balances creaminess with a tangy edge.
- Stunning presentation with their vibrant red hue and piped swirls.
- Versatile treat for birthdays, holidays, Valentine’s Day, or just because.
- Beginner-friendly recipe with step-by-step instructions.
Ingredients & Equipment
For the Cupcakes:
- 1 ½ cups (190 g) all-purpose flour
- 2 tablespoons (15 g) unsweetened cocoa powder
- 1 teaspoon baking soda
- ½ teaspoon salt
- ½ cup (120 ml) vegetable oil
- 1 cup (200 g) granulated sugar
- 2 large eggs, room temperature
- 1 teaspoon vanilla extract
- 1 cup (240 ml) buttermilk, room temperature
- 2 teaspoons white vinegar
- 2 tablespoons red food coloring (liquid or gel)
For the Cream Cheese Frosting:
- 8 oz (225 g) cream cheese, softened
- ½ cup (115 g) unsalted butter, softened
- 3–4 cups (360–480 g) powdered sugar, sifted
- 1 teaspoon vanilla extract
Equipment:
- 12-cup muffin tin
- Paper cupcake liners
- Mixing bowls
- Whisk and spatula
- Hand mixer or stand mixer
- Piping bag with star tip (optional, for decorating)
Pro Tip: Use gel food coloring for a deeper red hue without thinning out the batter.
Step-by-Step Instructions
1. Prepare the Oven and Pan
Preheat your oven to 350°F (175°C). Line a 12-cup muffin tin with paper liners.
2. Mix Dry Ingredients
In a medium bowl, whisk together flour, cocoa powder, baking soda, and salt. Set aside.
3. Beat Wet Ingredients
In a large bowl, whisk oil and sugar until smooth. Add eggs one at a time, mixing well after each. Stir in vanilla.
4. Add Buttermilk, Vinegar, and Food Coloring
Mix in buttermilk, vinegar, and red food coloring until well combined. The batter should be vibrantly red.
5. Combine Wet and Dry Ingredients
Gradually fold the dry mixture into the wet mixture until just combined. Avoid overmixing to keep cupcakes tender.
6. Fill and Bake
Divide batter evenly among cupcake liners, filling each about ⅔ full. Bake for 18–20 minutes, or until a toothpick inserted into the center comes out clean. Let cupcakes cool in the pan for 5 minutes, then transfer to a wire rack to cool completely.
7. Make the Frosting
In a large bowl, beat cream cheese and butter until smooth and fluffy. Gradually add powdered sugar, one cup at a time, until desired consistency is reached. Stir in vanilla extract.
8. Frost and Decorate
Once cupcakes are completely cool, pipe or spread frosting generously on top. Garnish with red sprinkles, mini chocolate chips, or cupcake crumbs for a bakery finish.
Expert Tips & Troubleshooting
- Dense cupcakes? Avoid overmixing the batter after adding the dry ingredients.
- Too brown instead of red? Use gel food coloring and high-quality cocoa powder for the best results.
- Runny frosting? Chill frosting for 10–15 minutes before piping if it’s too soft.
- Flat tops? Be sure your baking soda is fresh for proper rise.
Variations & Customizations
- Mini Red Velvet Cupcakes: Bake in a mini muffin tin for 10–12 minutes.
- Filled Cupcakes: Core the center and fill with cream cheese frosting or raspberry jam.
- Chocolate Ganache Drizzle: Add a glossy chocolate drizzle on top for an elegant touch.
- Holiday-Themed Toppings: Use heart sprinkles for Valentine’s or green sprinkles for Christmas.

Serving & Presentation Ideas
- Serve on a tiered cupcake stand for a party centerpiece.
- Top with edible glitter or gold foil for a glamorous touch.
- Pair with coffee, hot cocoa, or sparkling cider for a perfect dessert spread.
- Wrap individually in cupcake boxes for gifts or party favors.
Storage & Make-Ahead Tips
- Room Temperature: Store unfrosted cupcakes in an airtight container for 2 days.
- Refrigerated: Frosted cupcakes keep in the fridge for up to 5 days.
- Freezing: Freeze unfrosted cupcakes for up to 2 months. Thaw and frost before serving.
- Frosting: Make frosting up to 3 days ahead and store in the refrigerator. Bring to room temperature before using.
Frequently Asked Questions
Q: Can I make these cupcakes without food coloring?
Yes! They’ll be “velvet” cupcakes with a light cocoa flavor but without the red hue.
Q: Why is vinegar used in the recipe?
Vinegar reacts with baking soda and buttermilk to create a tender, fluffy crumb.
Q: Can I use low-fat cream cheese for the frosting?
It’s best to use full-fat cream cheese for the creamiest, most stable frosting.
Conclusion
Red Velvet Cupcakes with Cream Cheese Frosting are more than just a dessert—they’re a celebration of flavor, texture, and style. With their moist crumb, rich frosting, and vibrant color, they make any occasion feel extra special. This recipe combines simplicity with bakery-worthy results, ensuring that even beginner bakers can succeed.
Whether you’re baking them for Valentine’s Day, a birthday, or simply to brighten a winter afternoon, these cupcakes are sure to impress. Once you take that first bite, you’ll understand why red velvet remains a timeless favorite.