
Red Velvet Birthday Cake with Cream Cheese Frosting – Classic, Rich & Perfectly Celebratory
Introduction
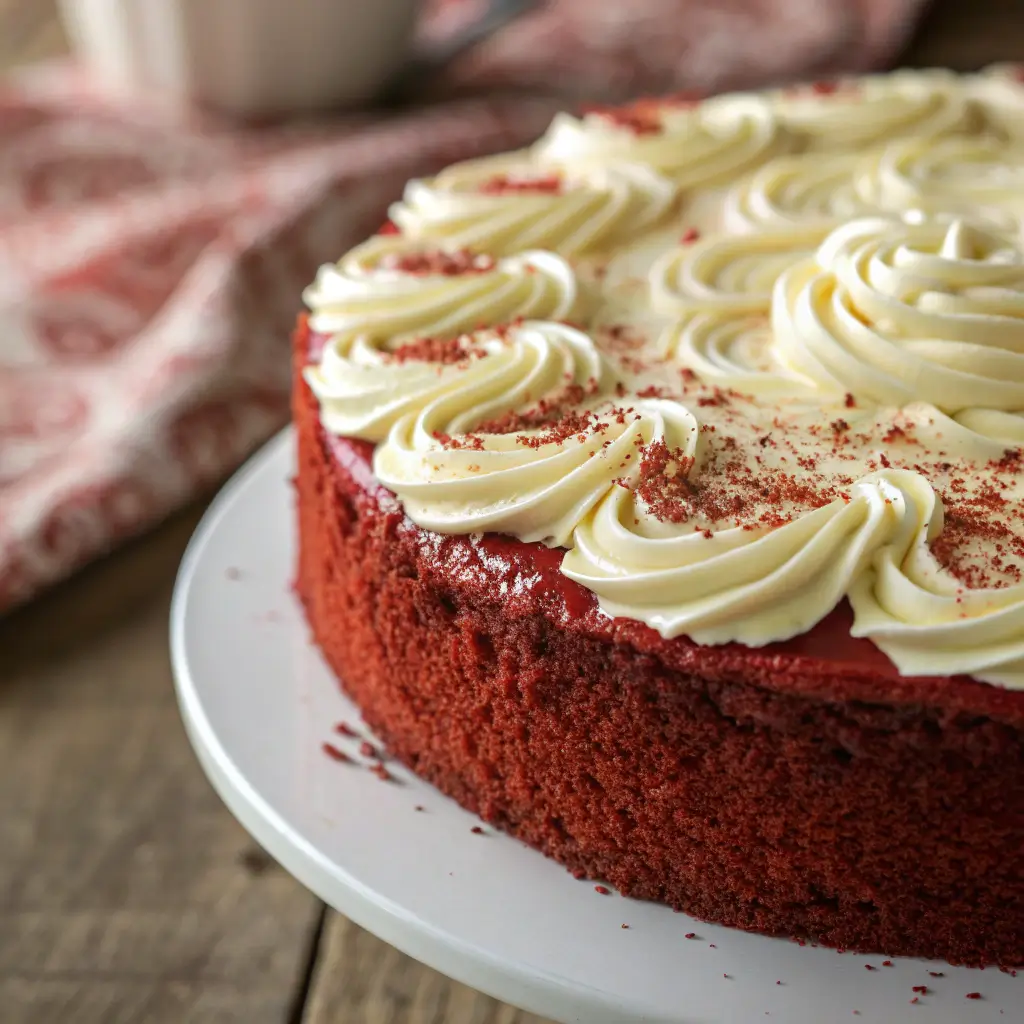
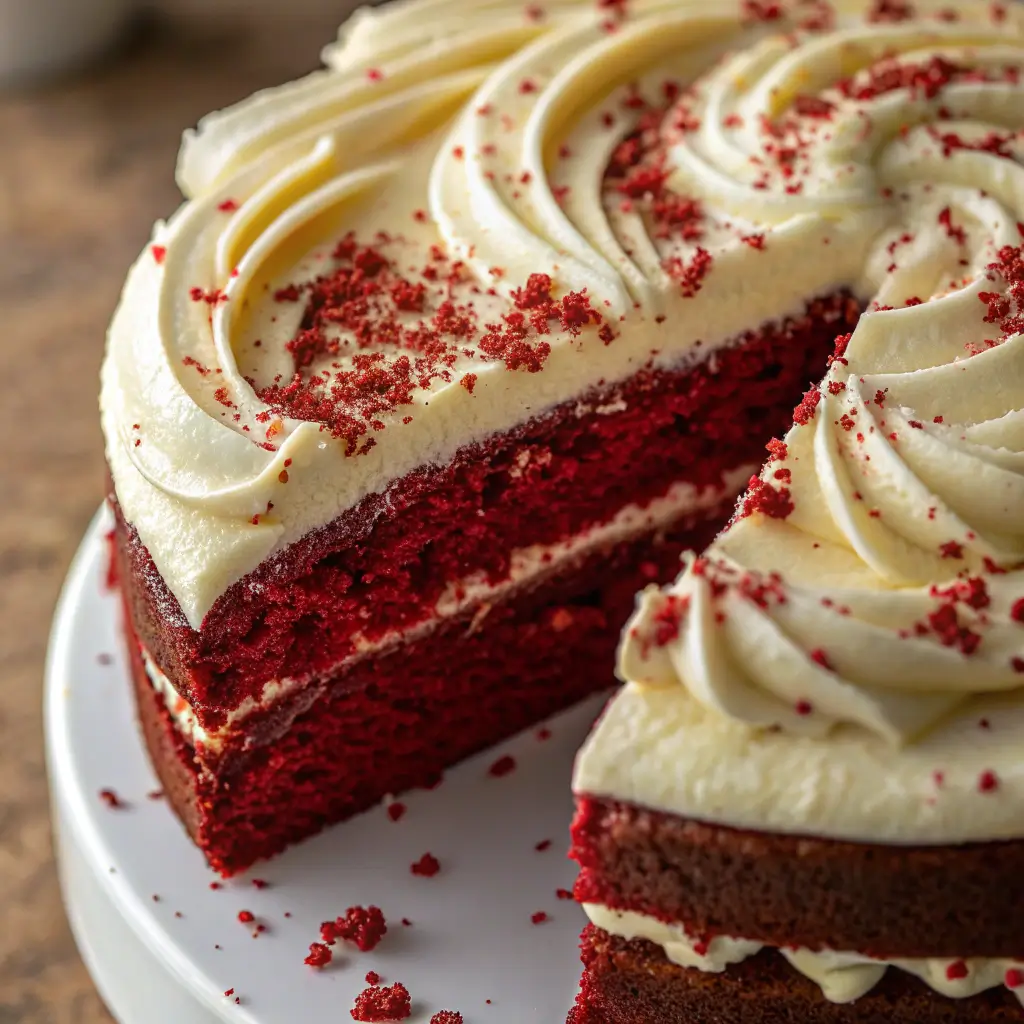
A Red Velvet Birthday Cake with Cream Cheese Frosting is a timeless celebration dessert that combines soft, velvety cake layers with tangy, creamy frosting. Known for its signature deep red color and subtle cocoa flavor, red velvet cake is both elegant and indulgent—making it a perfect choice for birthdays of all ages.
What makes red velvet unique is its texture. The cake is moist, tender, and smooth, with just a hint of cocoa that adds depth without overpowering sweetness. Paired with luscious cream cheese frosting, it creates a beautiful balance between rich and tangy flavors.
Whether you’re baking for a child’s party, a milestone birthday, or a formal celebration, this red velvet cake delivers both stunning presentation and unforgettable taste. With clear steps and helpful tips, you can create a bakery-style masterpiece right at home.
What Makes Red Velvet Cake Special?
Red velvet cake is known for three defining features:
- Its vibrant red color, traditionally achieved with food coloring.
- Its soft, tender crumb, created by combining buttermilk and vinegar for a light texture.
- Subtle cocoa flavor, which enhances depth without making the cake taste like chocolate.
The cream cheese frosting is essential—it complements the cake’s sweetness with a slightly tangy finish that makes every bite perfectly balanced.
Why You’ll Love This Recipe
- Moist, velvety cake texture
- Beautiful deep red color
- Classic cream cheese frosting
- Perfect balance of sweet and tangy
- Elegant yet approachable
- Ideal for birthdays and special occasions
Ingredients and Equipment
For the Red Velvet Cake Layers
- 3 cups (375 g) all-purpose flour
- 2 tablespoons unsweetened cocoa powder
- ½ teaspoon baking soda
- ½ teaspoon salt
- 1 cup (225 g) unsalted butter, softened
- 1 ¾ cups (350 g) granulated sugar
- 4 large eggs, room temperature
- 1 tablespoon vanilla extract
- 2 ½ teaspoons baking powder
- 1 cup (240 ml) buttermilk, room temperature
- 1 tablespoon white vinegar
- 1–2 tablespoons red gel food coloring
For the Cream Cheese Frosting
- 16 oz (450 g) cream cheese, softened
- 1 cup (225 g) unsalted butter, softened
- 4–5 cups (480–600 g) powdered sugar, sifted
- 1 teaspoon vanilla extract
Optional Garnish
- Red velvet cake crumbs
- Fresh berries
- White chocolate shavings
Essential Equipment
- Two 8-inch (20 cm) round cake pans
- Electric mixer
- Mixing bowls
- Offset spatula
- Wire cooling rack
Gel food coloring is recommended for vibrant color without thinning the batter.
Step-by-Step Instructions
Step 1: Prepare the Oven and Pans
Preheat the oven to 350°F (175°C). Grease and line cake pans with parchment paper.
Step 2: Mix the Dry Ingredients
In a medium bowl, whisk together flour, cocoa powder, baking powder, baking soda, and salt. Set aside.
Step 3: Cream Butter and Sugar
In a large bowl, beat butter and sugar on medium speed for 3–4 minutes until light and fluffy.
Step 4: Add Eggs and Flavor
Add eggs one at a time, mixing well after each addition. Stir in vanilla extract and red food coloring.
Step 5: Combine Wet and Dry Ingredients
Alternate adding dry ingredients and buttermilk, beginning and ending with dry ingredients. Mix until smooth.
Stir in vinegar gently. The vinegar reacts with baking soda to create a soft, tender crumb.
Step 6: Bake the Cake
Divide batter evenly between prepared pans.
Bake for 25–30 minutes, or until a toothpick inserted into the center comes out clean.
Cool completely before assembling.
Step 7: Make the Cream Cheese Frosting
Beat cream cheese and butter together until smooth and creamy.
Gradually add powdered sugar, mixing on low speed. Add vanilla extract and beat until light and fluffy.
Avoid overmixing to maintain a stable texture.
Step 8: Assemble the Cake
Place one cake layer on a serving plate.
Spread an even layer of cream cheese frosting on top.
Place the second layer on top and frost the entire cake smoothly.
Decorate with cake crumbs or piped frosting swirls.
Expert Tips for Perfect Red Velvet Cake
- Use room-temperature ingredients for smooth mixing.
- Do not overmix after adding flour to keep cake tender.
- Chill cake slightly before final frosting for cleaner edges.
- Apply a crumb coat before the final frosting layer.
- Use gel food coloring for vibrant red color.
If you prefer a deeper cocoa note, add an extra teaspoon of cocoa powder.
Creative Variations
You can personalize your red velvet birthday cake in several ways:
- Add a thin layer of raspberry filling between layers.
- Decorate with white chocolate drip for contrast.
- Pipe rosettes around the edges for a formal look.
- Make cupcakes instead for individual servings.
For a more dramatic presentation, leave the sides semi-naked to showcase the red layers.
Serving and Presentation
Slice with a sharp knife and wipe between cuts for clean, defined layers.
Serve slightly chilled or at cool room temperature. This cake pairs beautifully with milk, coffee, or tea.
Its bold red color makes it a striking centerpiece for any birthday table.
Storage and Make-Ahead Tips
Store in the refrigerator in an airtight container for up to 5 days.
Cake layers can be baked in advance and frozen for up to 2 months.
Bring cake closer to room temperature before serving for best texture.
Frequently Asked Questions
Does red velvet taste like chocolate?
It has a mild cocoa flavor but is lighter and less intense than chocolate cake.
Can I skip the food coloring?
Yes, but the cake will not have its traditional red appearance.
Why is vinegar added?
Vinegar reacts with baking soda to create a softer texture.
Can I use buttercream instead of cream cheese frosting?
Yes, but cream cheese frosting is the traditional pairing.
Conclusion
This Red Velvet Birthday Cake with Cream Cheese Frosting delivers classic flavor, stunning color, and velvety texture in every slice. Balanced, elegant, and timeless, it’s a perfect choice for birthdays and special celebrations.
With its soft crumb and tangy frosting, this cake transforms simple ingredients into a beautiful and memorable centerpiece 🎂❤️✨