
One Pan Balsamic Chicken: An Easy, Flavorful Weeknight Dinner
Introduction
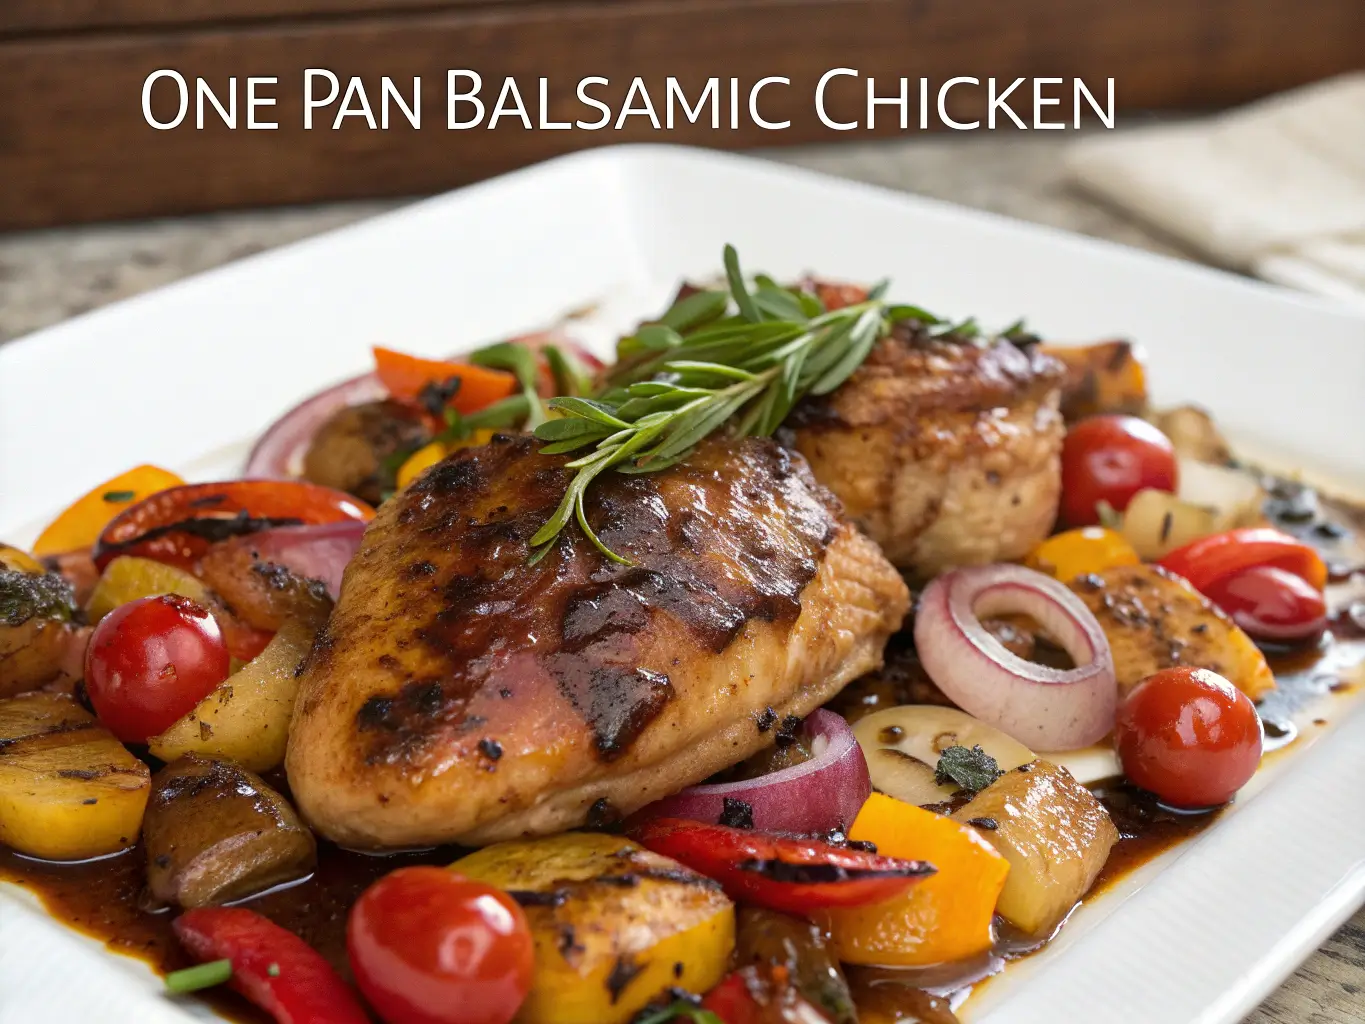
In today’s fast-paced world, finding time to prepare a wholesome, delicious meal can feel like a challenge. That’s where this One Pan Balsamic Chicken comes in—a dish that delivers gourmet flavor with minimal effort and cleanup. Perfect for busy weeknights, meal prep, or even impressing dinner guests, this recipe combines juicy chicken, caramelized vegetables, and a rich balsamic glaze that will have everyone asking for seconds.
What makes this recipe truly special?
Effortless cleanup – Cook everything in a single pan, saving time and dishes.
Nutritious and balanced – Packed with lean protein and colorful vegetables.
Quick and foolproof – Ready in under 30 minutes, even for beginner cooks.
Endlessly adaptable – Swap ingredients based on what’s in your fridge.
Whether you’re a college student, a working parent, or just someone who loves great food without the hassle, this dish is a must-try. Let’s explore how to make it!
The Origins of Balsamic Chicken
Balsamic vinegar, a prized ingredient in Italian cuisine, originates from the Modena and Reggio Emilia regions of Italy. Traditionally aged in wooden barrels for years (sometimes decades!), this dark, syrupy vinegar develops a complex balance of sweetness and acidity. While balsamic-glazed chicken isn’t a centuries-old recipe, it embodies the Italian philosophy of enhancing simple ingredients with bold, harmonious flavors.
The magic of this dish lies in the reduction of balsamic vinegar, which thickens into a glossy, caramelized glaze. When paired with garlic, herbs, and a touch of honey, it transforms ordinary chicken into a restaurant-worthy meal.
Fun Fact: Authentic traditional balsamic vinegar (Aceto Balsamico Tradizionale) is so valued that it’s often given as a wedding gift in Italy!
Why You’ll Love This Recipe
One-pan convenience – No juggling multiple pots and pans.
Healthy yet indulgent – The balsamic glaze adds richness without excess calories.
Meal-prep superstar – Tastes even better the next day.
Kid-friendly – The sweet-tangy sauce appeals to picky eaters.
Easily customizable – Works with whatever vegetables you have on hand.
Ingredients & Equipment
For the Chicken & Marinade:
- 4 boneless, skinless chicken breasts (or thighs for extra juiciness)
- 3 tbsp balsamic vinegar (the best quality you can find)
- 2 tbsp olive oil (extra virgin for best flavor)
- 1 tbsp honey (or maple syrup for a vegan option)
- 2 garlic cloves, minced (or ½ tsp garlic powder in a pinch)
- 1 tsp dried thyme (or rosemary, oregano, or Italian seasoning)
- ½ tsp salt (adjust to taste)
- ¼ tsp black pepper (freshly ground preferred)
For the Vegetables:
- 1 red bell pepper, sliced (adds sweetness and color)
- 1 yellow bell pepper, sliced (or use orange or green)
- 2 tbsp olive oil (for roasting the veggies)
- 1 red onion, sliced (white or yellow onion works too)
- 1 cup cherry tomatoes (or grape tomatoes)
- Salt & pepper to taste
Optional Add-Ins:
- 1 cup sliced mushrooms (for an earthy flavor)
- 1 zucchini, sliced (adds freshness)
- Handful of fresh basil (for garnish)
Equipment:
- Large oven-safe skillet (cast iron works beautifully)
- Tongs (for flipping chicken)
- Whisk (for mixing the marinade)
- Measuring spoons (for precise seasoning)
Pro Tips:
- Marinate longer for deeper flavor – If time allows, let the chicken sit in the marinade for up to 2 hours.
- Use a meat thermometer – Chicken is done at 165°F (74°C).
- Don’t overcrowd the pan – Cook in batches if needed for better browning.
Step-by-Step Instructions
1. Marinate the Chicken
- In a medium bowl, whisk together balsamic vinegar, olive oil, honey, minced garlic, thyme, salt, and pepper.
- Add the chicken breasts and coat them evenly in the marinade.
- Let sit for at least 10 minutes (or up to 2 hours in the fridge for maximum flavor).
Why this step matters: Marinating helps tenderize the chicken and infuse it with flavor.
2. Sear the Chicken
- Heat 1 tbsp olive oil in a large skillet over medium-high heat.
- Once hot, add the chicken (shaking off excess marinade) and cook for 5 minutes per side until golden brown.
- Remove the chicken and set aside on a plate.
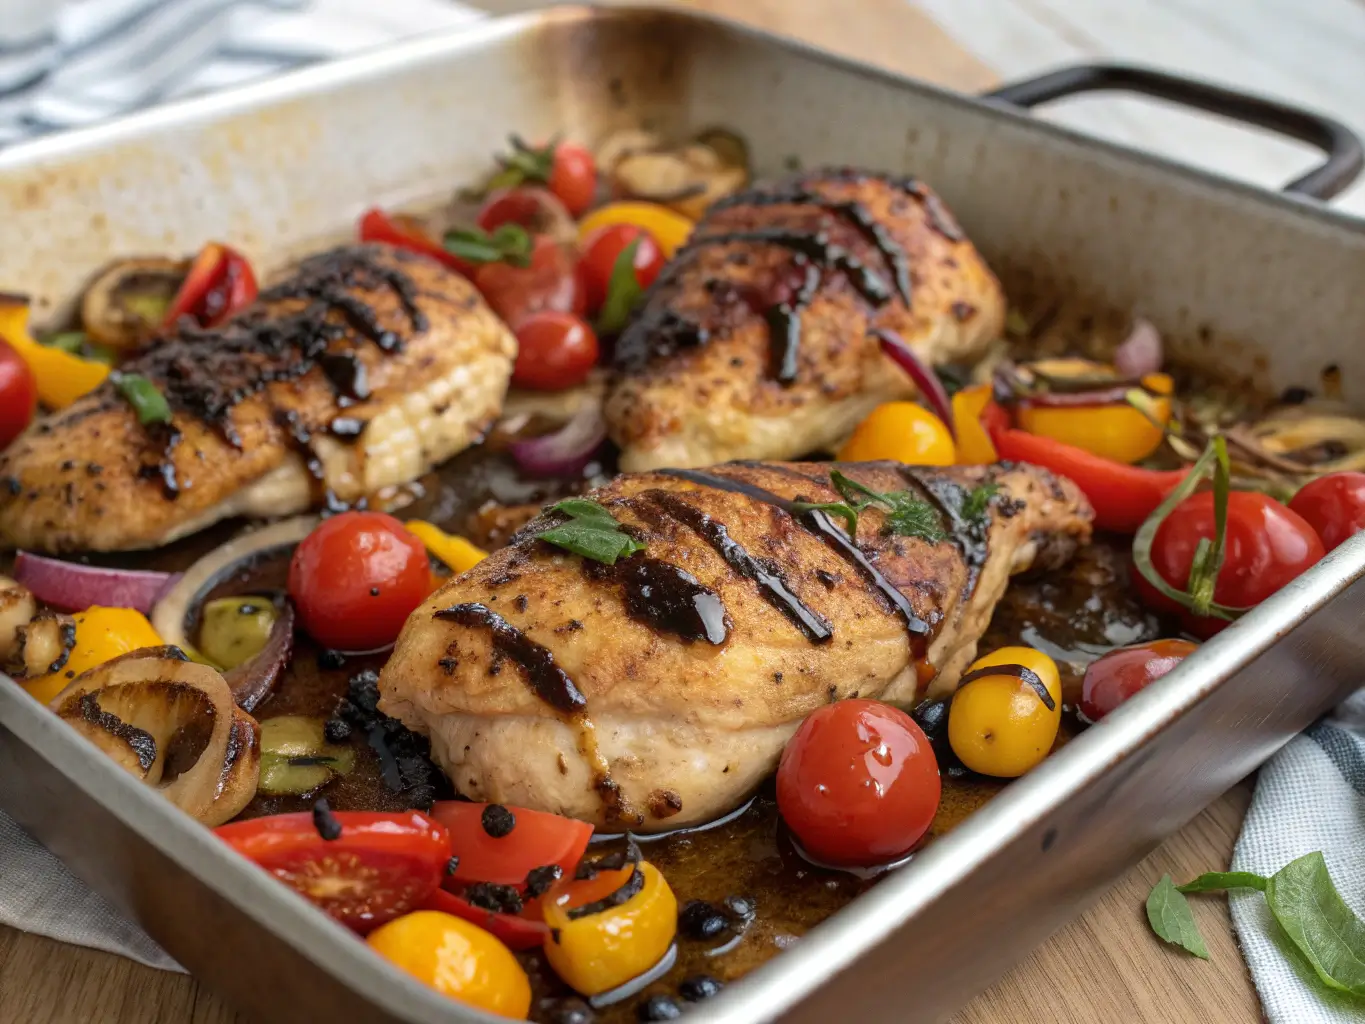
Visual Cue: Look for a deep caramelized crust on the chicken.
3. Cook the Vegetables
- In the same pan, add the remaining 1 tbsp olive oil.
- Toss in the bell peppers and onions, sautéing for 3 minutes until slightly softened.
- Add the cherry tomatoes and cook for 2 more minutes.
Pro Tip: If the pan seems dry, add a splash of water or broth to deglaze and scrape up flavorful browned bits.
4. Finish in the Oven (Optional but Recommended)
- Preheat your oven to 375°F (190°C).
- Return the chicken to the skillet, nestling it among the vegetables.
- Drizzle any remaining marinade over the top.
- Transfer the skillet to the oven and bake for 10 minutes, or until the chicken reaches 165°F (74°C) internally.
Why bake? This ensures even cooking and melds all the flavors together.
5. Rest and Serve
- Let the chicken rest for 5 minutes before slicing (this keeps it juicy).
- Garnish with fresh herbs if desired.
Expert Tips & Troubleshooting
- Chicken too dry? Overcooking is the culprit. Use a meat thermometer and pull it at 165°F.
- Sauce too thin? Simmer the marinade separately for a few minutes to thicken it.
- Not caramelizing? Ensure your pan is hot enough before adding the chicken.
- Too tangy? Balance the balsamic with an extra drizzle of honey.
Variations & Customizations
- Mediterranean Twist – Add kalamata olives and feta cheese before serving.
- Creamy Version – Stir in 2 tbsp Greek yogurt at the end for a richer sauce.
- Spicy Kick – Add ½ tsp red pepper flakes to the marinade.
- Herb-Infused – Use fresh rosemary or sage for a fragrant touch.
Serving & Presentation Ideas
🍽 Pair with:
- Garlic mashed potatoes – Soaks up the delicious sauce.
- Quinoa or couscous – For a lighter, protein-packed side.
- Crusty bread – Perfect for mopping up the glaze.
🌿 Garnish with:
- Fresh basil or parsley
- A sprinkle of Parmesan cheese
- Toasted pine nuts for crunch
Storage & Make-Ahead Tips
- Fridge: Store in an airtight container for up to 3 days.
- Freezer: Freeze (without veggies) for up to 3 months.
- Reheat: Warm in a skillet with a splash of water or broth to refresh the sauce.
Meal Prep Hack: Double the recipe and portion it out for easy lunches.
FAQ Section
Q: Can I use chicken thighs instead of breasts?
A: Absolutely! Thighs are more forgiving and stay juicier. Adjust cooking time as needed.
Q: What’s the best balsamic vinegar to use?
A: Look for “Modena” or “Aged” balsamic for the best flavor. Avoid cheap, overly acidic versions.
Q: Can I make this without an oven?
A: Yes! Just cover the skillet and let it simmer on low heat until the chicken is cooked through.
Conclusion
This One Pan Balsamic Chicken is proof that gourmet meals don’t have to be complicated. With minimal prep, easy cleanup, and incredible flavor, it’s a recipe you’ll turn to again and again.
Ready to try it? Gather your ingredients, grab your skillet, and let’s get cooking! Don’t forget to share your delicious results in the comments—we’d love to hear how it turned out. 🍽️✨
Hungry for more? Check out our other one-pan wonders for stress-free dinners!