
Baked Honeycrisp Apples with Nuts & Brown Sugar
Introduction
There’s something magical about the aroma of baked apples wafting through the kitchen on a cool autumn day. Baked Honeycrisp Apples with Nuts & Brown Sugar capture that magic perfectly—combining tender, juicy apples with a warm, spiced filling of crunchy nuts, sweet brown sugar, and a touch of butter for richness. This simple dessert brings all the cozy flavors of fall into one baking dish, making it ideal for family dinners, gatherings, or just a quiet night in.
Unlike complicated pastries or pies, this recipe requires minimal effort but delivers all the comfort and satisfaction of a homemade treat. It’s a wholesome, naturally sweetened dessert that highlights the natural flavor of Honeycrisp apples—known for their crisp texture and balanced sweetness. Best of all, it’s easily adaptable for various diets and can be prepared ahead of time, making it a perfect make-ahead fall dessert.
A Bit of Background
Baking apples has been a beloved tradition for centuries, tracing back to early European and colonial kitchens where fresh apples were stuffed with dried fruits, nuts, and spices to create hearty yet simple desserts. Before modern refrigeration, baked apple recipes were a creative way to use and preserve seasonal produce through the colder months. The Honeycrisp variety, developed in Minnesota in the 1990s, quickly became a favorite for baking due to its juicy, crisp flesh that holds its shape beautifully in the oven.
This classic baked apple dessert continues that tradition—combining modern simplicity with old-fashioned comfort. Whether served warm with a scoop of vanilla ice cream or a drizzle of maple syrup, it’s a timeless dish that evokes nostalgia and warmth.
Why You’ll Love This Recipe
- Minimal Effort, Maximum Flavor: Only a few simple steps for a dessert that tastes gourmet.
- Healthy-ish Treat: Naturally sweetened with fruit and just enough brown sugar for caramelization.
- Customizable: Works with any nut variety, dried fruit, or sweetener you prefer.
- Perfect for Entertaining: Elegant presentation with almost no cleanup.
- Cozy Comfort Food: A warm, spiced aroma that fills your home with fall charm.
Ingredients & Equipment
For the Apples:
- 4 large Honeycrisp apples, cored (about 800 g / 1.75 lb)
- 2 tablespoons unsalted butter (28 g), cut into small pieces
- 3 tablespoons brown sugar (40 g)
- 1 teaspoon ground cinnamon
- ¼ teaspoon ground nutmeg
- 1 teaspoon pure vanilla extract
- Pinch of sea salt
For the Filling:
- ½ cup chopped walnuts or pecans (60 g)
- ¼ cup rolled oats (25 g)
- 2 tablespoons maple syrup (30 ml)
- 2 tablespoons brown sugar (25 g)
- 1 tablespoon melted butter (14 g)
- Optional: 2 tablespoons raisins or dried cranberries for added texture
Equipment:
- Apple corer or paring knife
- Mixing bowl
- Baking dish (8×8-inch or similar)
- Aluminum foil
Pro Tips:
- Choose firm apples like Honeycrisp, Fuji, or Braeburn to ensure they don’t collapse while baking.
- If you prefer a lighter dessert, substitute butter with coconut oil or vegan margarine.
- Add a splash of lemon juice to the apples before baking to enhance brightness.
Step-by-Step Instructions
Step 1: Prepare the Apples
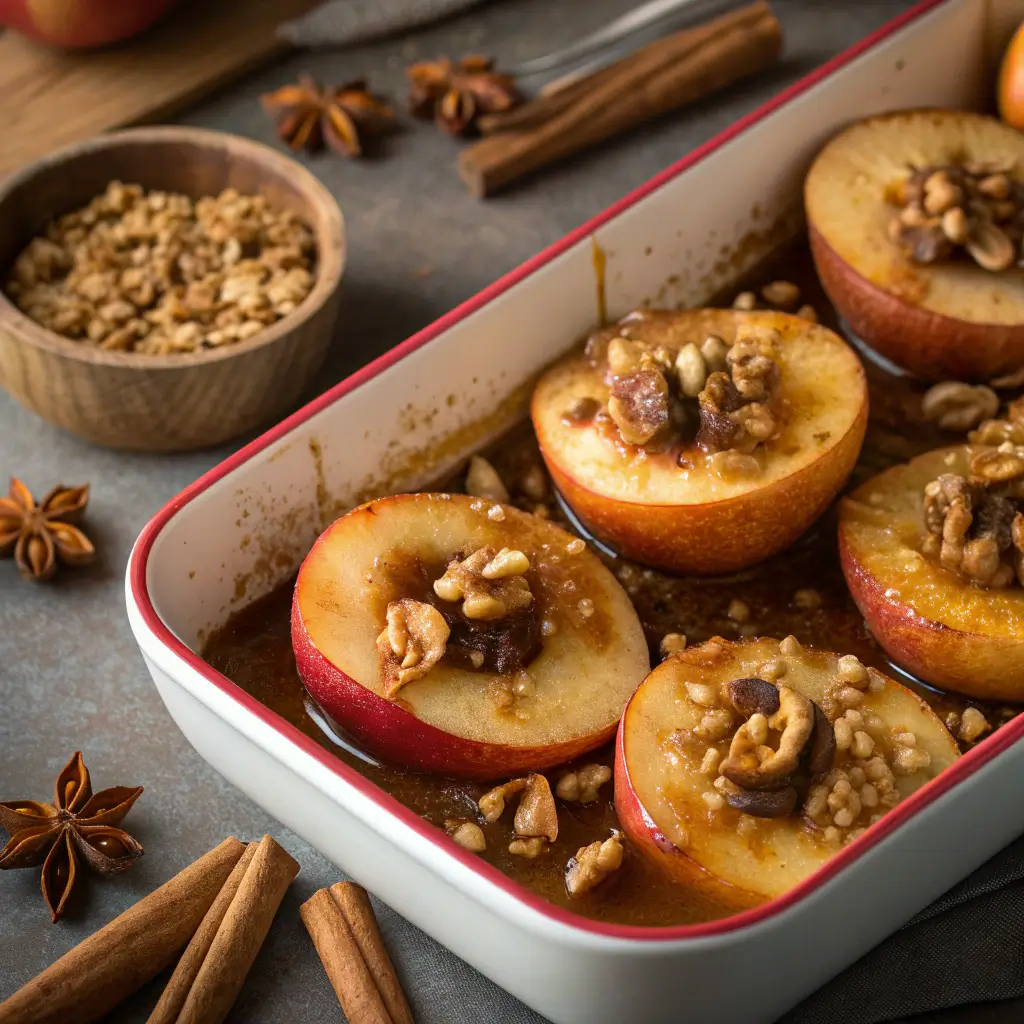
Preheat your oven to 180°C (350°F). Wash the apples thoroughly, then carefully core them using an apple corer or a paring knife, leaving about 1 cm (½ inch) at the bottom to create a small well for the filling. Place the apples upright in a baking dish.
Step 2: Mix the Filling
In a small bowl, combine the chopped nuts, oats, brown sugar, maple syrup, melted butter, cinnamon, nutmeg, and vanilla. Stir until the mixture is evenly coated and slightly sticky. If you’re using raisins or dried cranberries, fold them in at this stage.
Step 3: Fill the Apples
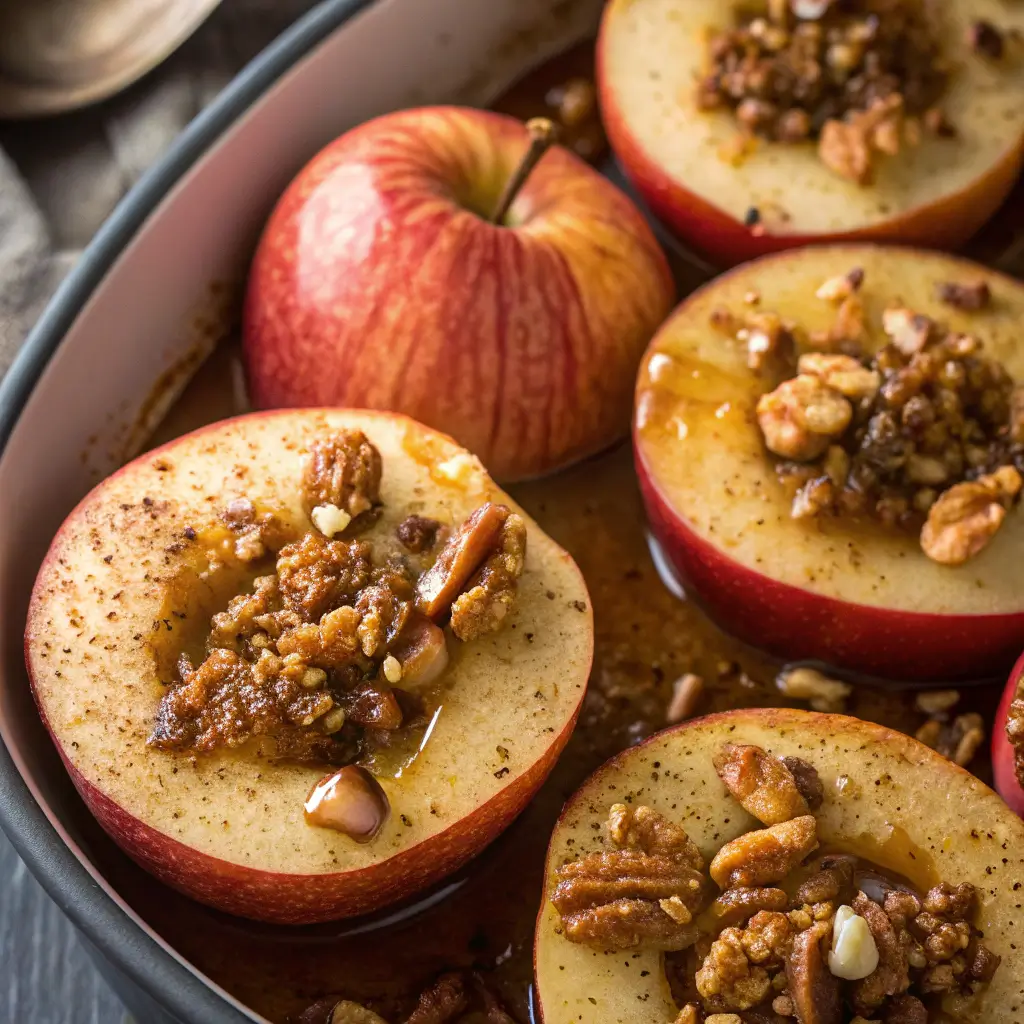
Spoon the nut mixture into each apple cavity, pressing down gently to pack the filling tightly. Any leftover filling can be sprinkled around the apples in the baking dish for extra crunch.
Step 4: Add Moisture and Bake
Add ¼ cup (60 ml) of water to the bottom of the baking dish to prevent burning and help steam the apples. Top each apple with a small pat of butter. Cover loosely with aluminum foil and bake for 25 minutes. Remove the foil and continue baking for 15–20 minutes more, until the apples are tender but still hold their shape. The filling should be bubbling and slightly caramelized.
Step 5: Serve Warm
Let the apples cool for about 5 minutes before serving. Spoon the caramelized juices from the pan over each apple for added flavor.
Expert Tips & Troubleshooting
- If the apples split: This can happen if they’re overbaked or if the oven runs hot. Reduce bake time by 5–10 minutes next time.
- Too sweet? Use less brown sugar or opt for unsweetened applesauce instead of syrup.
- Not sweet enough? Add a drizzle of honey or maple syrup right before serving.
- Want more texture? Toast the nuts before mixing them into the filling for a deeper flavor.
Variations & Customizations
- Stuffed Apple Crisp: Add a few tablespoons of crushed granola to the filling for extra crunch.
- Spiced Chai Version: Replace cinnamon and nutmeg with ½ teaspoon of chai spice blend.
- Savory Twist: Mix a little goat cheese or cream cheese into the filling for a sweet-savory balance.
- Vegan Version: Swap butter for coconut oil and ensure all sugars are plant-based.
Serving & Presentation Ideas
Serve these baked apples warm and drizzle with the pan’s natural syrup. They pair beautifully with a scoop of vanilla ice cream, a dollop of Greek yogurt, or even a spoonful of whipped coconut cream. For an elegant touch, sprinkle with powdered sugar or drizzle with extra maple syrup before serving.
You can also serve them alongside breakfast dishes—like oatmeal or pancakes—for a comforting fall-inspired brunch.
Storage & Make-Ahead Tips
Store leftover baked apples in an airtight container in the refrigerator for up to 3 days. Reheat in the oven at 160°C (325°F) for 10 minutes or in the microwave for 1–2 minutes until warm. To make ahead, prepare the apples and filling, then refrigerate (unbaked) for up to 24 hours. Bake just before serving for the best texture.
For longer storage, freeze baked apples in individual containers for up to 2 months. Thaw overnight in the refrigerator before reheating.
FAQ
Can I use a different apple variety?
Yes! Try Fuji, Gala, or Pink Lady apples for slightly different sweetness levels and textures.
Do I need to peel the apples?
No—the peel helps the apple keep its shape during baking and adds extra fiber and nutrients.
Can I double the recipe?
Absolutely. Just use a larger baking dish and extend the baking time by about 10 minutes.
Conclusion
Baked Honeycrisp Apples with Nuts & Brown Sugar are proof that the simplest desserts can be the most satisfying. With warm spices, rich caramelized sweetness, and a tender baked texture, each bite tastes like autumn comfort. Whether you’re preparing it for a dinner party or a cozy evening at home, this dessert is sure to impress. Try it once, and it’ll become a staple in your fall baking repertoire.