
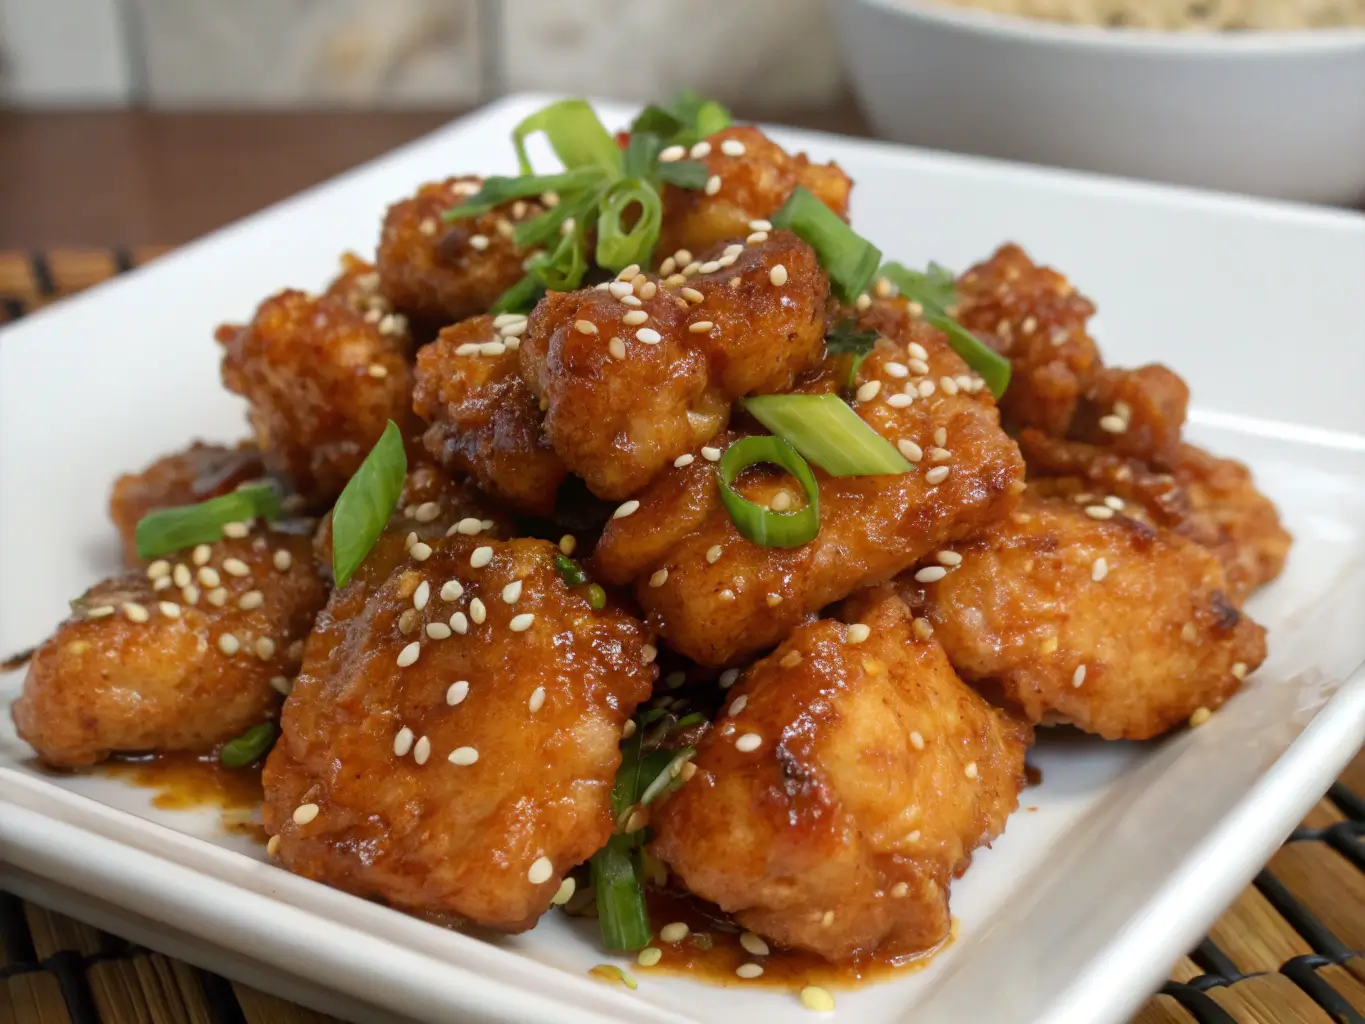
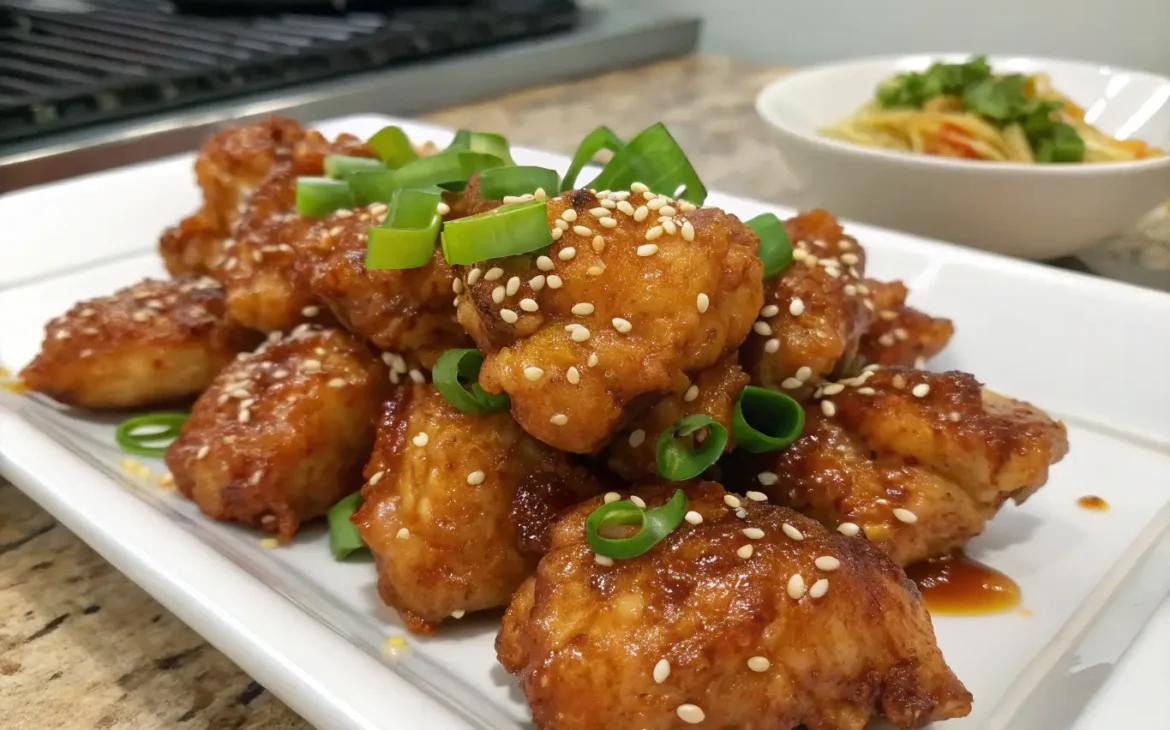
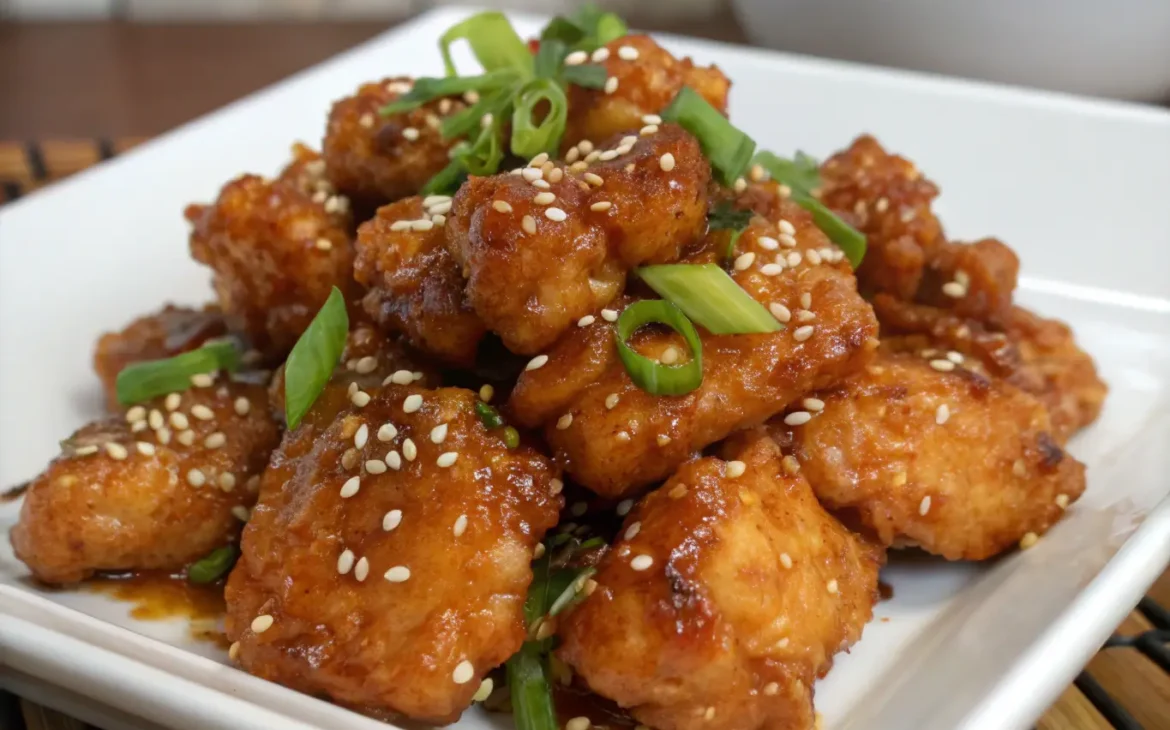
Ultimate Crispy Honey Chicken: A Sweet & Crunchy Takeout Fakeout Masterclass
Few dishes satisfy the craving for sweet, sticky, and crunchy Chinese takeout like Crispy Honey Chicken. This comprehensive guide will teach you how to make the perfect homemade version with restaurant-quality crispiness and a glossy honey sauce that’s better than any takeout. We’ll cover multiple cooking methods, expert techniques for maximum crispiness, and creative variations to suit every taste.
Why This Recipe Beats Takeout Every Time
Science-backed crispiness – Learn the secret double-fry technique and cornstarch magic
Healthier than restaurant versions – Control oil quality and quantity
Customizable sweetness and spice – Adjust to your perfect flavor balance
Meal prep friendly – Components store beautifully for quick meals
Multiple cooking methods – Deep fry, air fry, or oven-bake options
Bonus: Discover how to make it gluten-free and lower-sugar without sacrificing flavor!
The Science Behind Perfect Crispy Honey Chicken
Understanding these key principles will guarantee success every time:
- The Cornstarch Effect
- Cornstarch creates a lighter, crispier coating than flour alone
- Forms a protective barrier that keeps chicken juicy inside
- Absorbs less oil than traditional batter
- Double-Fry Magic
- First fry at 325°F (165°C) cooks the chicken through
- Second fry at 375°F (190°C) creates ultimate crispiness
- The Maillard reaction creates complex flavors
- Sauce Timing
- Tossing just before serving preserves texture
- Proper thickening prevents sogginess
Ingredients Breakdown
For the Crispy Chicken (Detailed Measurements)
- 1.5 lbs (680g) boneless chicken (breast or thighs)
Breast for leaner, thighs for juicier - ¾ cup (100g) cornstarch
- ¼ cup (30g) all-purpose flour
Substitute rice flour for gluten-free - 1.5 tsp baking powder
Creates air pockets for crispiness - 1 large egg + 2 tbsp water
- 1 tsp salt
- ½ tsp white pepper
- 1 tbsp vodka (optional)
Alcohol evaporates faster for crispier coating
For the Signature Honey Sauce
- ½ cup (120ml) high-quality honey
Local or orange blossom recommended - ¼ cup (60ml) soy sauce
Use tamari for gluten-free - 3 tbsp rice vinegar
- 3 tbsp brown sugar
- 4 garlic cloves, microplaned
- 1 tbsp fresh ginger, grated
- 2 tsp toasted sesame oil
- 1 tbsp gochujang (optional)
For Korean-inspired spicy-sweet version
Essential Equipment
- Instant-read thermometer
Crucial for perfect oil temp - Spider strainer or slotted spoon
- Wire cooling rack
Prevents steaming on paper towels - Wok or Dutch oven
For even heat distribution
Step-by-Step Cooking Masterclass
1. Chicken Preparation (The Foundation)
- Cutting Technique
- Slice chicken into 1.5-inch uniform pieces
- Against the grain for tender bites
- Pat extremely dry with paper towels
- Coating Process
- Whisk dry ingredients thoroughly
- Egg wash with vodka (if using)
- Press coating firmly onto chicken
- Let rest 5 minutes before frying
2. Frying Perfection (3 Methods)
Professional Double-Fry Method
- Heat 3 inches oil to 325°F (165°C)
- Fry in batches for 3 minutes (par-cook)
- Drain on rack, heat oil to 375°F (190°C)
- Refry for 90 seconds until golden
Air Fryer Adaptation
- Spray coated chicken with oil
- Cook at 400°F (200°C) for:
- 8 minutes, flip
- 4-5 more minutes
Oven-Baked Alternative
- Bake at 450°F (230°C) on wire rack
- 12 minutes, flip, 8 more minutes
3. Sauce Mastery
- Flavor Development
- Sauté garlic/ginger 30 seconds
- Deglaze with vinegar
- Perfect Thickness
- Mix cornstarch with cold water first
- Add slurry slowly while stirring
- Final Adjustments
- Stir in sesame oil last
- Taste for sweet/sour balance
Expert-Level Tips & Troubleshooting
Crispiness Secrets
- Ice water trick – Dip coated chicken in ice water for 5 seconds before final coating
- Carbonated batter – Replace water in egg wash with club soda
- Cornstarch slurry – For extra crunch, spray chicken with slurry before final fry
Common Mistakes & Fixes
🔥 Soggy Chicken?
- Oil wasn’t hot enough – use thermometer
- Overcrowded the pan
🌡 Sauce Too Thick?
- Thin with 1 tbsp warm water at a time
🍯 Too Sweet?
- Balance with 1 tsp lemon juice
Next-Level Variations
Global Flavor Twists
- Korean Honey Butter
- Add 2 tbsp butter to sauce
- Finish with nori flakes
- Thai-Inspired
- Replace vinegar with lime juice
- Add lemongrass and fish sauce
- Sichuan Style
- Add 1 tbsp chili oil
- Garnish with peanuts
Dietary Adaptations
- Keto Version
- Use sugar-free honey substitute
- Almond flour coating
- Vegan Option
- Substitute fried tofu or cauliflower
- Agave instead of honey
Serving & Presentation
Restaurant-Worthy Plating
- Modern Bowl
- Jasmine rice base
- Quick-pickled veggies
- Drizzle pattern with sauce
- Family Style
- Pile chicken on banana leaf
- Garnish with edible flowers
- Lunch Box
- Separate sauce container
- Include crispy wonton strips
Perfect Pairings
- Vegetables
- Szechuan green beans
- Garlic broccoli
- Starters
- Hot & sour soup
- Summer rolls
Storage & Reheating Science
Meal Prep Guide
- Crispy Chicken
- Store unfried coated pieces up to 24 hours
- Cooked keeps 3 days (re-crisp before serving)
- Sauce
- Lasts 2 weeks refrigerated
- Freezes 3 months
Reviving Leftovers
- Oven Method
- 400°F (200°C) on rack for 5 minutes
- Air Fryer
- 3 minutes at 380°F (193°C)
- Stovetop
- Quick sear in dry non-stick pan
Frequently Asked Questions
Q: Can I make this without deep frying?
A: Yes! The air fryer or oven methods produce excellent results with less oil. For closest to deep-fried texture, use the oven method with a wire rack and convection setting.
Q: How do I prevent the sauce from making the chicken soggy?
A: Always toss just before serving. For parties, serve sauce on the side. The cornstarch in the coating helps create a moisture barrier.
Q: What’s the best oil for frying?
A: Peanut oil is ideal for its high smoke point and neutral flavor. Canola or vegetable oil work well too. Avoid olive oil for deep frying.
Q: Can I use this technique for other proteins?
A: Absolutely! This method works wonderfully for shrimp, pork tenderloin, or even firm fish like cod. Adjust cooking times accordingly.
Conclusion: Your Takeout Replacement Masterpiece
This Ultimate Crispy Honey Chicken guide gives you everything needed to recreate – and surpass – your favorite takeout dish at home. With multiple cooking methods, scientific explanations for perfect results, and endless customization options, you’ll never settle for soggy delivery again.
Pro Challenge: Try the double-fry method and taste the difference! Share your creations with #HoneyChickenMaster on social media.